

In Summary
Everyone likes familiarity, but sometimes engineers find themselves on unfamiliar ground in a new DAW. Whether you’re working on location or have decided it’s time for a change, here we talk about the things that really matter to get the job done.
Going Deeper
Nomadic Ways
With many of us finding ourselves working in different rooms, or travelling between places to record, mix, or even teach our craft, getting the job done fast between different, sometimes unfamiliar systems is not uncommon. Sometimes the reason to switch DAWs can be as simple as not wanting to prise that precious iLok from the studio. Other times a collaboration or a change of gear can bring change. Here are some of the things to know that will get you much of the way there when faced with everyone’s least favourite combo - something new to learn with no time to learn it!
Set To Forget
It’s easy to overlook one of the biggest eureka moments for early designers of software and GUIs in general: using the paper analogy to describe data. Files, Folders, and Projects are all totally burned into the DAW native’s way of thinking, but all of these are pre-digital concepts that are still essential to stay organised in the box.
When walking up to any DAW for the first time, it’s a good idea to establish where that project or session is actually being stored; some DAWs only ask you to save after the first take. Others won’t let you start before getting this one right, whereas some let you decide whether or not you want to put off the inevitable…
Next up is where recorded files are going to land. Is this alongside the project file, or in a dedicated directory somewhere else? How is that changed, if possible? For those situations where the recording drive is a different device to the mixing one, finding out how to save and move everything as expected is just as important as anything else. One fail-safe option is to record using a containing folder for the whole thing if possible - this can be copied to the second location using the Explorer or Finder. Opening the copy should confirm that everything is there - better still is to test on another system completely. DAW-specific functions that do the same thing include Pro Tools’ Save Copy In.
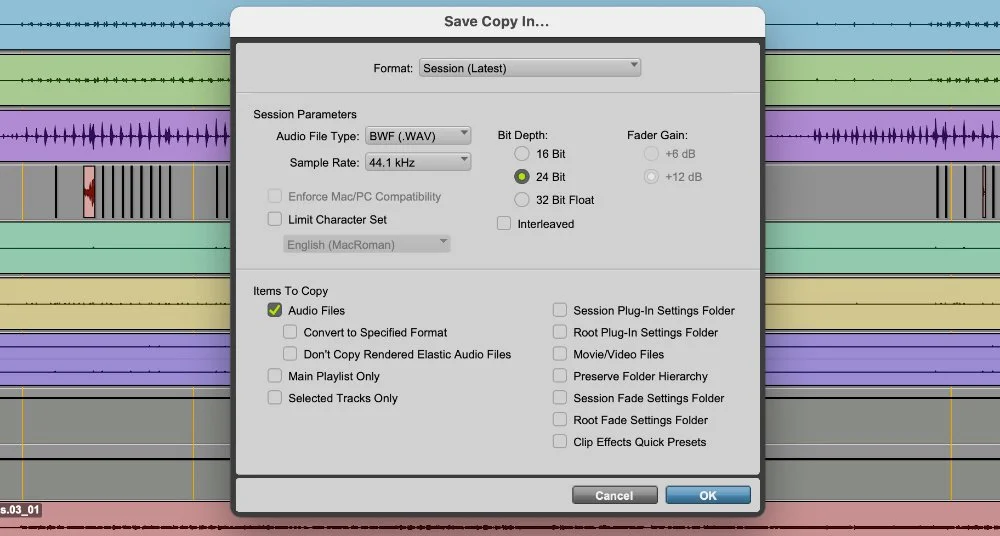
Pro Tools’ Save Copy In command - don’t forget to check “Audio Files”…
Harness The Hardware
None of this means anything unless you can record into the DAW, and preferably hear it back as well! Perhaps the next most important thing is finding out how your new DAW addresses your interface(s), and also how things like sample rate and bit depth will be determined. Are these latter things done on a per-project or global basis? Is it the project or application that tells your hardware what to do or does your system call the shots?
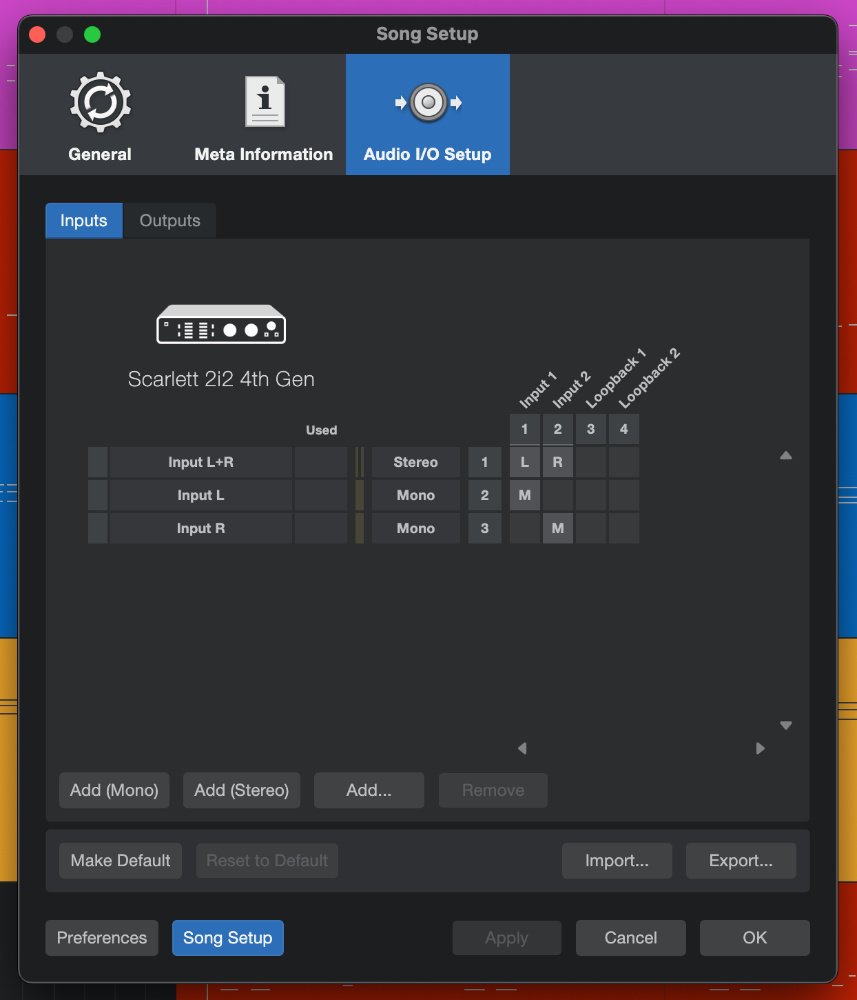
Studio One’s IO paths must be assigned to make them available in the Song.
When it comes to recording and mixing, most DAWs allow you to name your interface IO or just go with the default labels, but bear in mind that although your new DAW might be able to see the available physical IO, it might still need inputs and outputs to be enabled as a separate process.
One thing that is common to just about every DAW on the planet is where its project or application settings are. For all of these things, taking a little trip to the top left of the screen in any DAW on Windows or Mac is going to get you a little closer to the Settings or Preferences window that you need.
Find Your Way
Being able to navigate any DAW is essential, but getting the basics done doesn’t need an intimate knowledge of every corner of the platform. With most DAWs using the tried and tested timeline-with-mixer setup, from there it’s usually only a question of finding the transport controls to get rolling, mixing, or looping.
Many platforms have options for arranging the Big Three elements of the timeline, the mixer, and the transport either as attached or “docked” panels or tabs, or as floating windows that can be shown or hidden with shortcuts. Many have the ability to show mixer main functions in the same window as the timeline.
Although the finer points of your new platform’s functions can wait, learning a few shortcuts for showing and hiding the timeline, the mixer, and the transport, as well as how to roll, playback, or return to time-zero will be quicker than mousing around every time.
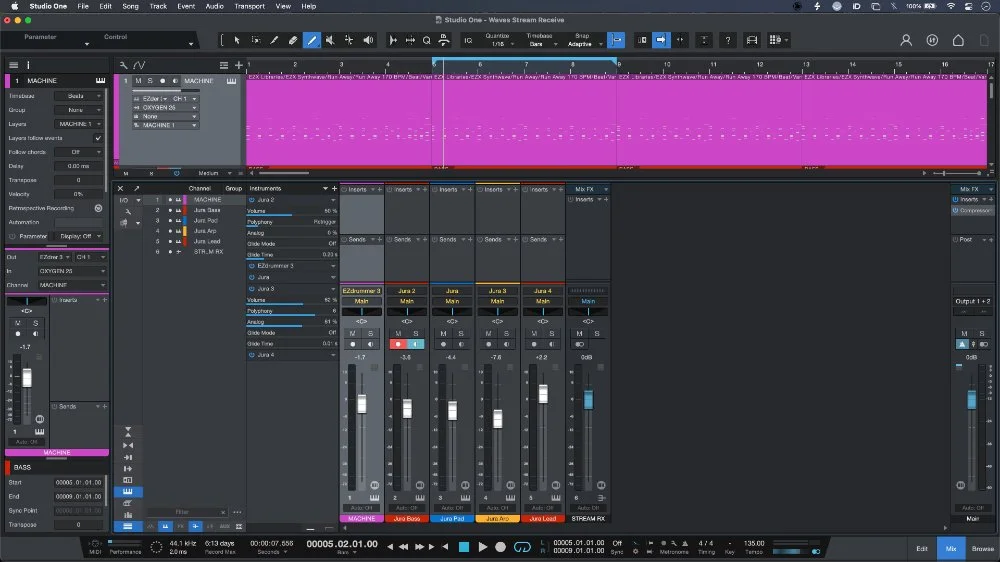
Docked mixer in Studio One.
Go With The Flow
Once the project is set up it’s time to start plugging in, and that means assigning inputs to tracks. Although your current DAW might have input and output paths that are easy to find in the track, others have adaptable layouts that change when a track is record enabled, so if you can’t see your tracks’ IO, try arming them to see what appears. Going with the default labels will get the job done, no matter how unfriendly they might seem at first; just about every DAW lists analogue inputs first followed by digital ones.
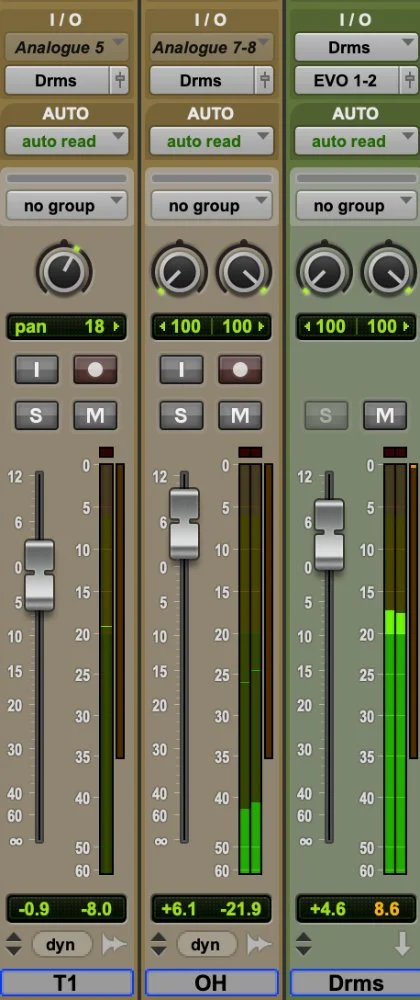
Top of shot: Pro Tools’ mixer I/O (input and output) paths.
Those working in a pro studio for the first time who are unfamiliar with Pro Tools should bear in mind that stereo pairs of inputs like to work in odd-even configurations - for example avoid patching your overheads Left into 10 and Right into 11.
On the output side of things, if you’re tracking a band and working in stereo, things should make it to outputs 1-2 in most DAWs assuming you’ve selected the correct interface. By extension your mix will probably hit your headphones as well in that scenario. If you’re undertaking a location band recording, trying to work out any cue mix sends or routing in the field isn’t fun for anyone; if those are coming from the DAW itself then getting to grips with those and building out the session before you head out will pay dividends.
Manage The Mixer
Just about every DAW’s mixer has channel strips with a signal flow that runs from top to bottom - this means that playback audio hits inserts first, followed by sends (if set to Pre Fade), finishing at the fader. This flow is preserved between inserts slots, meaning that audio plugins’ order from top to bottom also affects flow. This lets you decide whether you equalise compressed signals or compress equalised ones, for example. Some DAWs let you commit effects to disk, or put audio plugins in the record path, but if time is too tight to know exactly how this is done it’s probably best not to commit basic mistakes to disk…
Many mixes with more than a handful of tracks will use either submixes, groups, or both to get a handle on multiple sources. Different DAWs have their own way of doing this, but common to many is selecting multiple tracks with Shift or Control/Command as a way of routing multiple tracks to a bus or group. Some let you drag track routing icons to bus channels do this, while others use folder tracks to pipe constituent tracks through a common path.
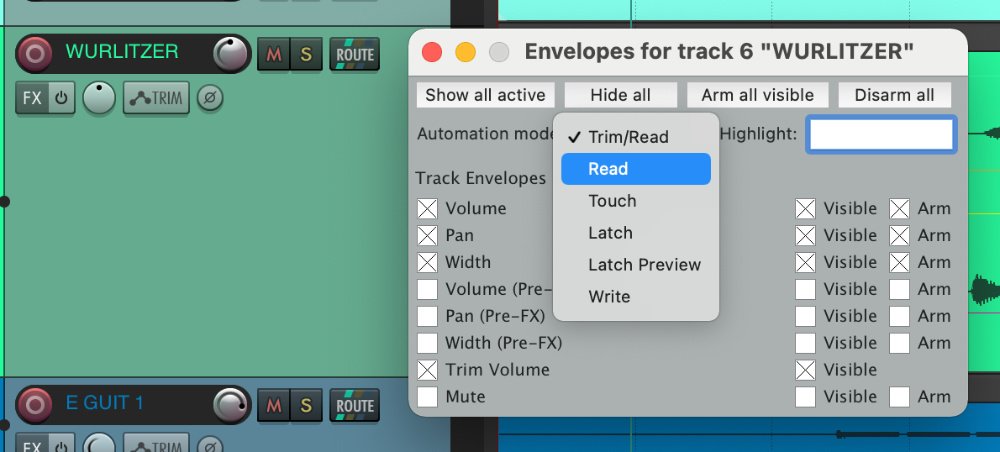
REAPER’s automation Envelopes window.
Whether your new DAW sports highly advanced automation, or more modest ways to animate the mixer, some might be surprised to see labels that are common to all, betraying their analogue mixer ancestors. Also common are the way they do things (broadly speaking), so leaving Write mode alone and favouring Touch and Trim modes will probably get your mixer moving as you might expect.
Finish The Job
Once all the above has been done and you’re happy with what you’re hearing, it’s time to transform the mix into the final finished file. Be it called Render, Bounce, Mixdown, Share, or anything else, options for these can also usually be found top left regardless of system or software. If you’re familiar with everyday file formats, everything in there will be pretty self-explanatory, but there are still a few other things to consider that do vary between platforms.
Spot the difference… Bounce, Render, Export, and Mixdown are often in the same place…
The first is dither. Is that still relevant? Yes, if your streaming service wants 16 bit files and you’re mixing in a 24 bit session. Some DAWs can let you apply dither in the Render/Bounce/Mixdown dialogue box, while others will need an audio plugin across the master fader. If your title has a fade out and your master inserts are pre fader, you’ll need to pipe your mix through an intermediate bus or output channel, and fade that out upstream of the master.
If you’re using a speaker correction plugin across your outputs, some DAWs will warn you of this when you go to bounce but others don’t - beware of this. The failsafe way to correct regardless of system is to do it downstream of the DAW, either system-wide, or on dedicated hardware.
The Next Job?
We all know how deep all DAWs can go, and when working with any new platform (or old one for that matter) we probably cannot know absolutely everything. Whatever the reason for going off road with a new tool, zooming out and remembering that many are developed by people like us, for people like us should go some way to reassure. Most of the time the details won’t matter as much as getting the job done as agreed…
