
In this article I share several adjustments I made in Windows 10 which made my experience of migrating from Mac to Windows much easier. Some of these issues took several weeks for me to resolve. If you've just switched to Windows from a Mac or you are considering a similar switch these pointers could save you many hours of frustration.
How difficult is it to switch from Mac OS to Windows? Many believe such a migration ends up being a painful experience and difficult to do right, however, my own recent experience of this switch turned out to be relatively straightforward.
There are differences between Windows and Mac OS but when working in third-party pro applications such as Studio One, Pro Tools and Photoshop the differences between operating systems feel slight. That's not to say I didn't come across a few issues which needed smoothing out. I needed to get my Windows system to feel more Mac-like to help me work more fluidly with my new system.
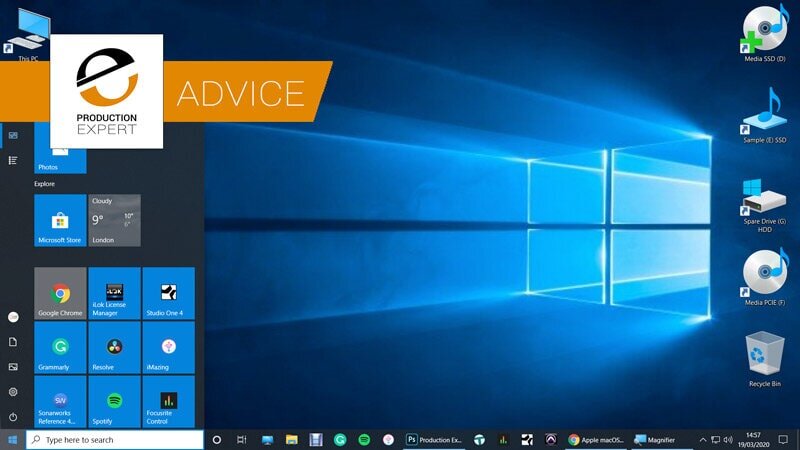
Arrange Windows 10 Taskbar To Mirror Your Old Mac OS Dock

I relied heavily on the Dock in Mac OS for accessing applications I used frequently. The arrangement of these apps within my Dock remained relatively unchanged for many years. I didn’t see any point in changing this familiarity now that I've moved to Windows 10. This is a simple tip for sure but having the Taskbar, which is Windows version of MacOS's Dock, arranged to match your outgoing Mac Dock is comforting when tackling the learning curve of a new operating system. There are several ways to add applications to the Taskbar in Windows 10.
Drag & Drop: This is simple enough to do if you locate applications within Windows' file directory. You can also drag & drop shortcuts to the Taskbar from the desktop.
Pin: Right Click on applications within Start Menu > All apps and you will find a Pin To Taskbar option.
To remove apps from the Taskbar simply right-click an app within the Taskbar and select Unpin from Taskbar. To reorder apps to taste click and drag the icons around.
Apple’s Magic Mouse - Watch It Disappear
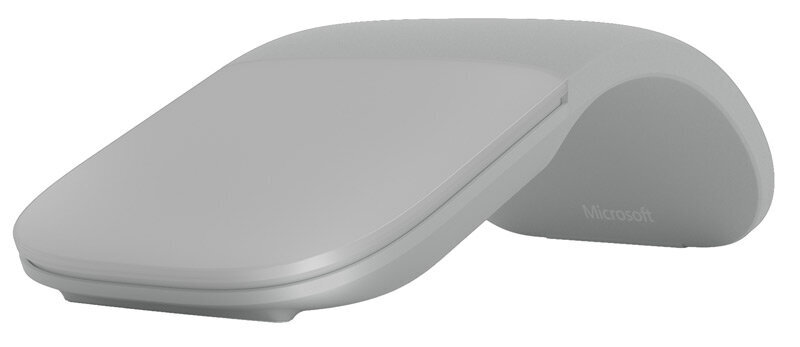
An Apple Magic Mouse has been under my right hand for over a decade's worth of studio work. I grew quite attached to it but moving forward with my Windows PC meant I had to find an alternative mouse. While some hacks can get Apple’s Magic Mouse working in Windows 10, my research suggested this might not be completely stable. I opted instead for Microsoft's Surface Arc mouse as these, like Apple's Magic Mouse, provide horizontal scrolling being a feature I rely heavily on for navigating left and right through mix and arrange windows in DAWs.
Addressing Clunky Cursor Behaviour In Windows 10
I experienced issues with cursor performance in Windows 10, which took a fair amount of tweaking to get to my liking. For weeks the cursor lagged and juddered around the screen. To fix this I downloaded an app called Microsoft Mouse and Keyboard Centre which only provides basic options for setting up a Microsoft mouse.
I had to access Windows 10 Control Panel > Hardware and Sound > Devices and Printers > Mouse to adjust pointer sensitivity. After much perseverance, the cursor still juddered around the screen until I started adjusting my display's refresh rate within Windows Settings > Display > Advanced Display Settings. By default, my Windows 10 system was set to display at a refresh rate of 30 Hertz, which is very low.
Refresh rate is the number of times your computer monitor updates with new images per second. Higher refresh rates result in smoother picture movement. After setting this to 60 Hertz, which my display supports, my cursor behaviour instantly became fluid, just how I liked it in Mac OS.
I have never needed to adjust refresh rate settings in Mac OS before. Maybe because Mac OS is tailor-made for Apple hardware whereas Windows settings may need to be less demanding by default to ensure a system functions out of the box. After all, Windows hardware and configurations, unlike Macs, are hugely diverse in comparison.
Making The Most Out Of Extra NVMe Storage
There's no point switching from one trusty system to something completely different if we don't make good use of expandibility. In my case, speaking literally, I have more PCIe slots available compared to my now retired Mac Pro 5.1. Alongside my PC's main 1TB NVMe drive for the system I decided to install an additional 2TB NVMe drive to act as my main media drive which proved a good idea. Sessions load incredibly fast from this. I only had space for one NVMe drive in my Mac Pro which served as my main boot drive with internal SSDs and HDDs working as sample and media drives.
Maintain Drive Names From One System To Another

This tip, Like the Mac OS Dock to Windows Taskbar suggestion earlier, is also simple. If you migrate from Mac to Windows and end up having the same internal storage setup why not carry over the same storage names to your Windows formatted drives? Anything you can do, may it be small or simple like this will help you feel a sense of familiarity which I found played a small role in taking the edge off learning a new operating system.
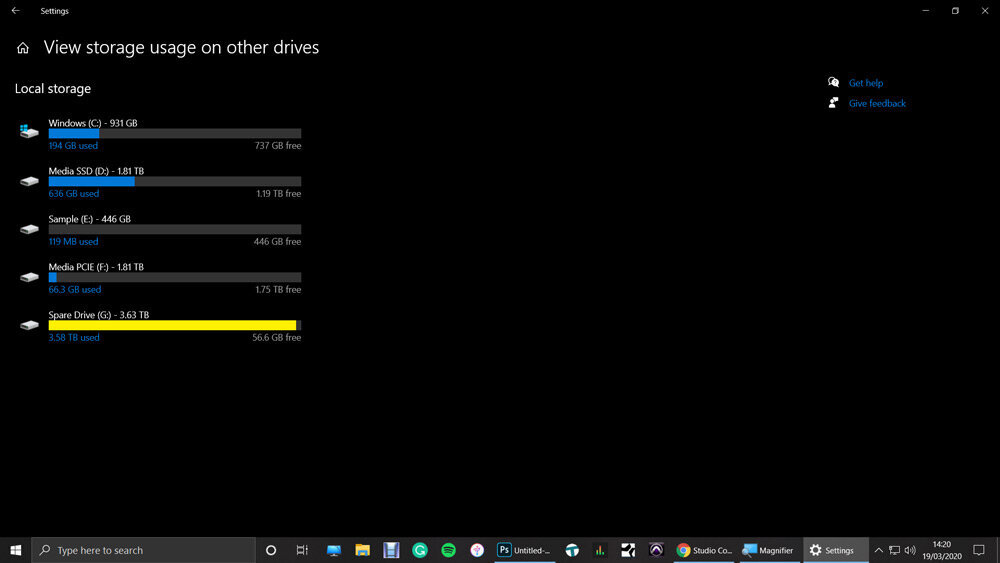
Keeping On Top Of Drive Storage
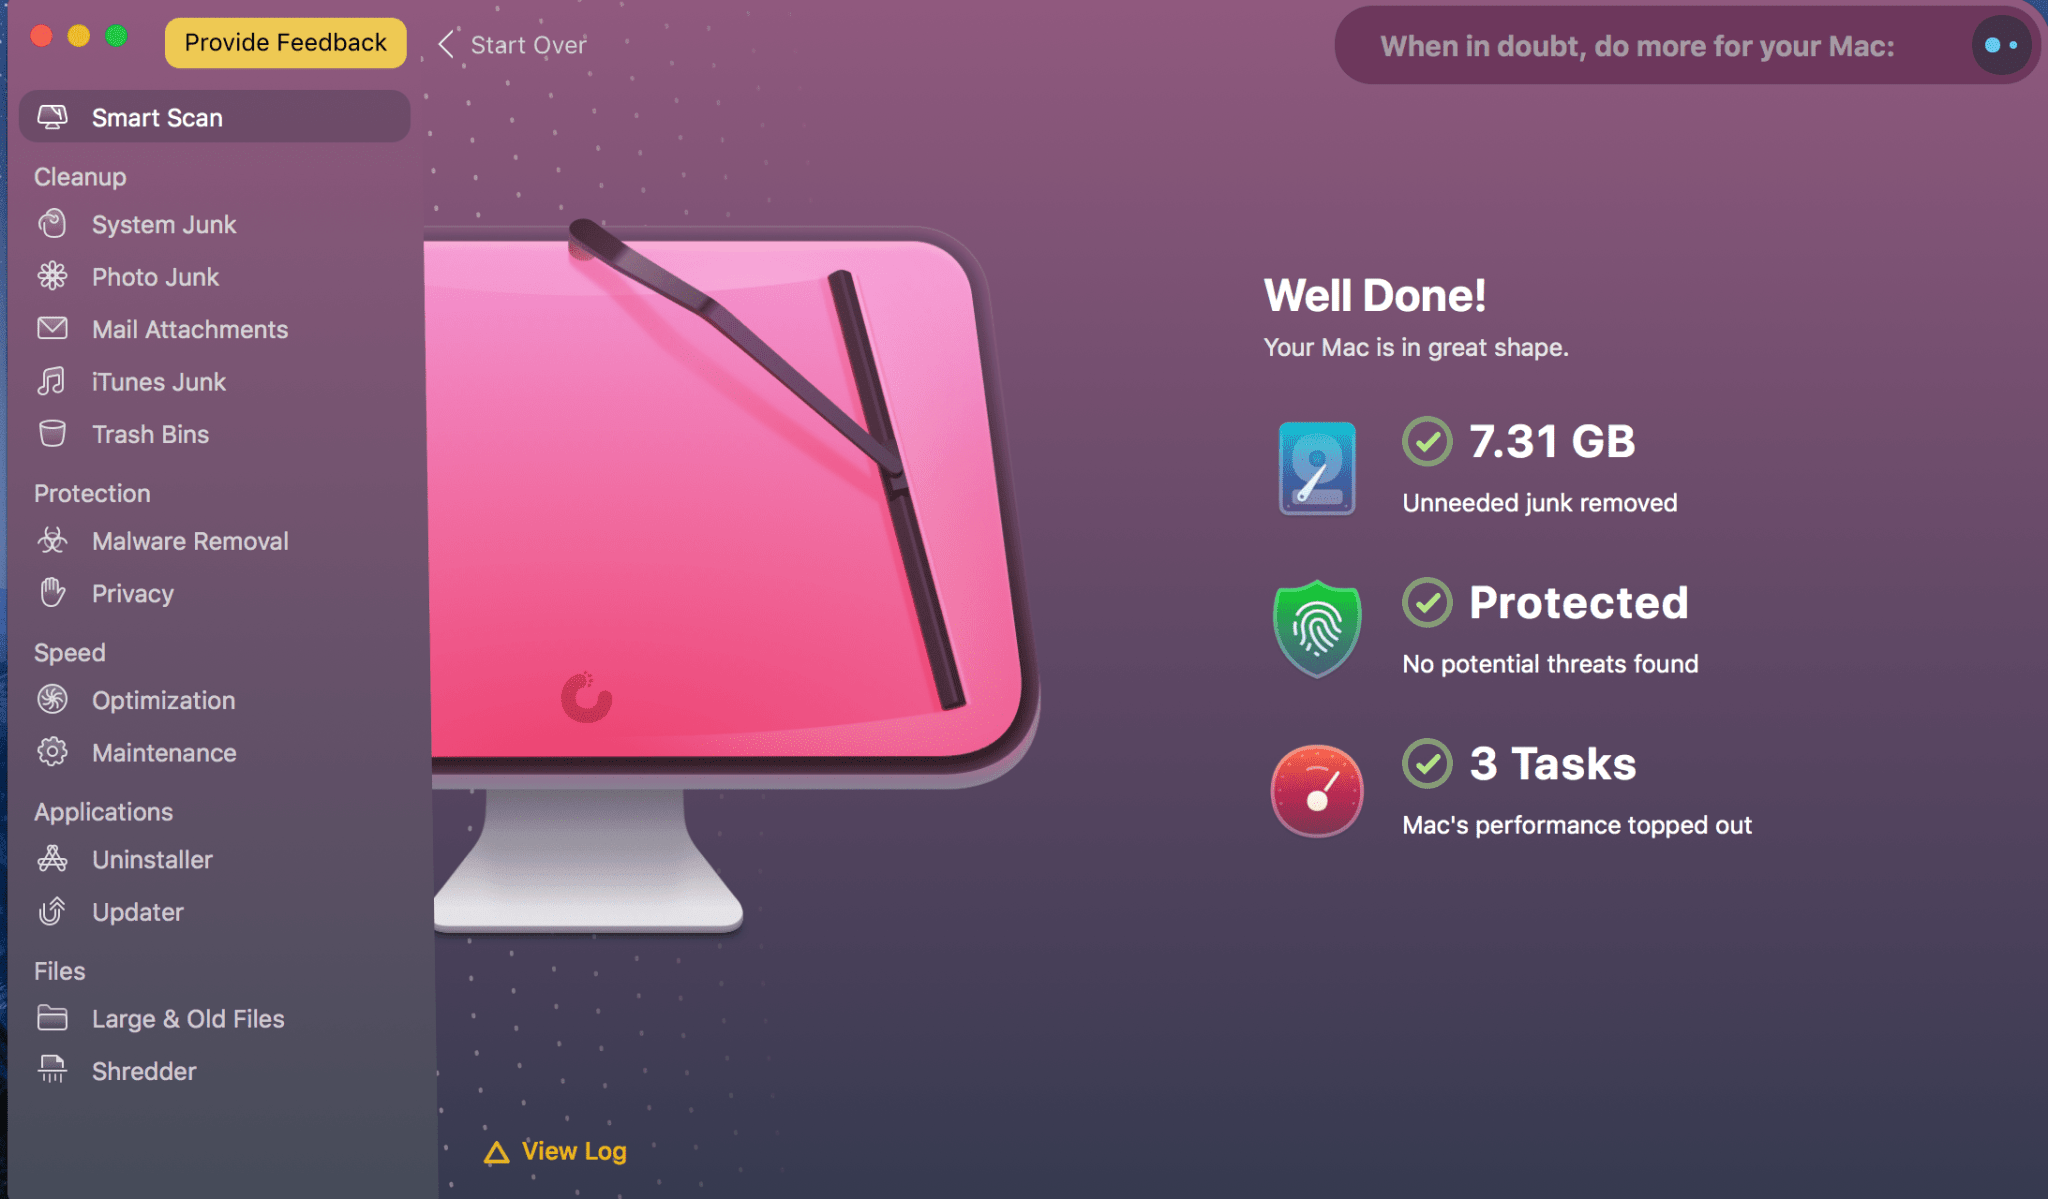
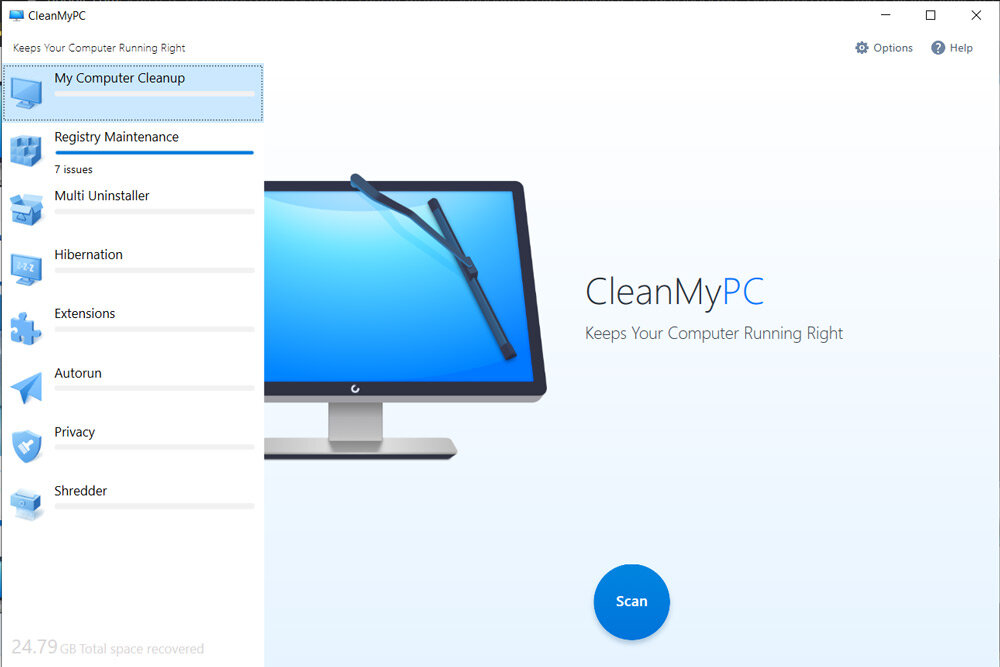
In my previous Mac OS workflow I relied heavily on CleanMyMac to keep system junk to a minimum. Many Production Expert Team members who use Macs use and can vouch for CleanMyMac. It takes the guess work out of keeping computer storage in order. MacPaw, the developers of CleanMyMac also provide a similar system for Windows called CleanMyPC. Within minutes of running CleanMyPC I cleaned up 24GB worth of junk in less than 20 seconds.
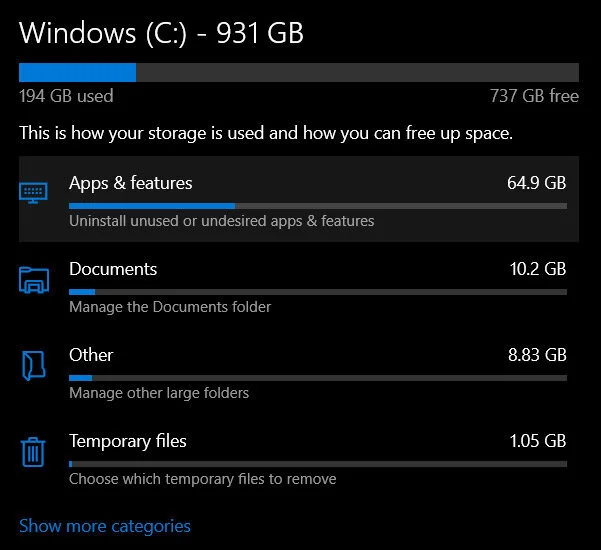
Storage Settings with Windows System is as powerful as CleanMyPC for quick and safe trashing of temporary files and system junk. Being able to view all my drives in once place and assess their volume states is crucial for me as I regularly work with lots of large file types in audio and video production.
In Summary
Short of downloading an Apple themed mountain picture for my PC’s desktop, these little adjustments helped me migrate from my Mac to Windows. My new system feels familiar to my retired Mac Pro 5.1. I knew what I wanted from Windows, it just took me a few weeks to work out how to set it all up. Hopefully this article will save time for those making a similar switch in their studio in the near future.
Have you switched from Mac To Windows? If so, please share your experiences below and any positive suggestions you feel may help The Production Expert Community.
