

Brief Summary
Making sounds or mixes wider is impressive but frustrating because you’ll find that the most impressive techniques fall apart in mono. Here are some things to know about getting wide.
Going Deeper
Let’s face it, big, wide stereo is impressive, it sounds great and narrow sounds can just sound a bit underwhelming by comparison, it’s completely understandable that being able to make narrow sounds wide and wide sounds even wider is something we all want to do from time to time. Exactly how best to do it is more complicated through. In this article Julian looks at a variety of techniques and products which can help.
The Downside Of Stereo
We do need to get something out of the way straight away, wide stereo isn’t a free lunch. There is a downside - poor mono-compatibility due to phase differences between the channels causing destructive interference and comb filtering, or in the most extreme cases cancelling out to silence! Check out our article illustrating the pitfalls of mono compatibility on smart speakers. Going from stereo to mono is a downmixing operation - taking more channels and mixing them down to fewer channels. Exactly the same kinds of compatibility issues arise when downmixing surround and immersive content, however in this article we’re only concerning ourselves with stereo.
Create Width Using Polarity And Delay
Two of the simplest techniques you can try in any DAW are some of the most impressive and also illustrate the problem perfectly. Flipping the polarity of one side of an identical pair of mono channels panned hard left and right is the nuclear option for width. It’s a great introduction to sum and difference processing, also known as mid-side, and is the ideal example for what can happen when you go too far with artificial widening. To do this using just your DAW, duplicate a mono track, pan them left and right and invert the polarity of one of them. Immediately you’ll hear the dramatic push to the sides, with the sound appearing to extend beyond the speakers, accompanied by a characteristic ‘hole in the middle’ between the speakers. It’s the aural equivalent of having your head sucked inside out! Put this effect on a pad synth or guitar and you’ll have all the striking, super-wide stereo drama you could ask for. However if you audition your mix in mono you’ll find that material treated in this way disappears completely! This is mono compatibility at its worst.
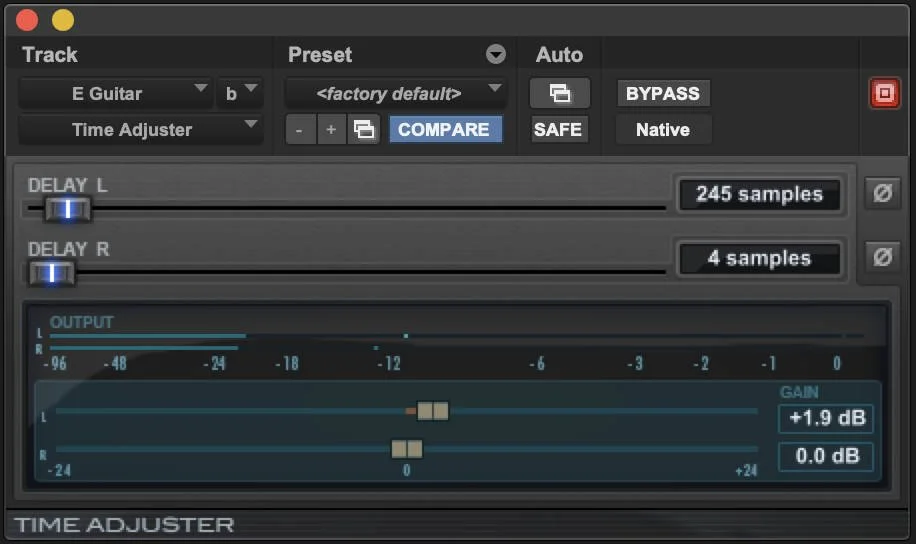
A short delay between channels can give a pleasing width but in mono it sounds like a phasey mess!
A similarly dramatic but frustratingly mono incompatible technique is to apply a short delay to one side of a stereo signal. It should be very short indeed and 100% wet with zero feedback. This delay will introduce a precedence effect which, if short enough, will mimic the way a sound which originates from one side arrives at each of our ears at slightly different times, moving its apparent position in the stereo panorama but also introducing a very appealing sense of width. However, if you play this back in mono you’ll hear a characteristic timbre change caused by interference between the two tracks, this is known as comb filtering.
Create Width Using EQ
Many of the widening tasks we encounter while mixing involve trying to ‘stereoise’ mono sounds. This is more difficult that making an already stereo signal wider. A third method of introducing width, which suffers less from mono incompatibility is using a different EQ on each side of a stereo channel. The impression of stereo width relies on small differences between the otherwise identical audio which reaches each ear. Differences in timing, timbre and phase all contribute to a more or less convincing widening. By sympathetically applying different EQ to each channel a moderate widening can be applied and usually leaves the mono reproduction more or less undamaged. And of course these different approaches to widening can, and are, applied in combination with each other. If you see someone using the trick of EQing the sides channel using MS processing, they are using these polarity and EQ techniques in combination
Other Stereo Widening Techniques
Reverbs introduce width and the best reverbs are incredibly convincing, using something like a mono/stereo instantiation of Liquidsonics Cinematic Rooms favouring the early reflections over the tail adds width, along with a little perceived distance. You can get great results using FabFilter’s Pro-R to set up a very close short reverb and using the width control to spread the sound. However if you’re looking to use plugins there are those dedicated to stereoising mono sounds and widening sounds which are already stereo.
Stereoising Mono Sources
You’ll probably have a plugin which can widen a mono source out to stereo among the stock plugins which come with your DAW. If you are a Pro Tools user the AIR Stereo Width plugin can use one of three processing options to add width. However the results can’t match those offered by dedicated premium plugins. The best I’ve heard is the Stereoiser from Nugen Audio, who given their pedigree for upmix and downmix surround and immersive format plugins, probably see mono to stereo as basic stuff. Hear Stereoiser demonstrated on a synth part in this free tutorial.
Widening Stereo Sources
If you want to use the tools you have in your DAW to widen stereo material there is a great deal you can do using stock plugins, as well as any stereo wideners your DAW might offer. There is also the option of using mid/side processing.
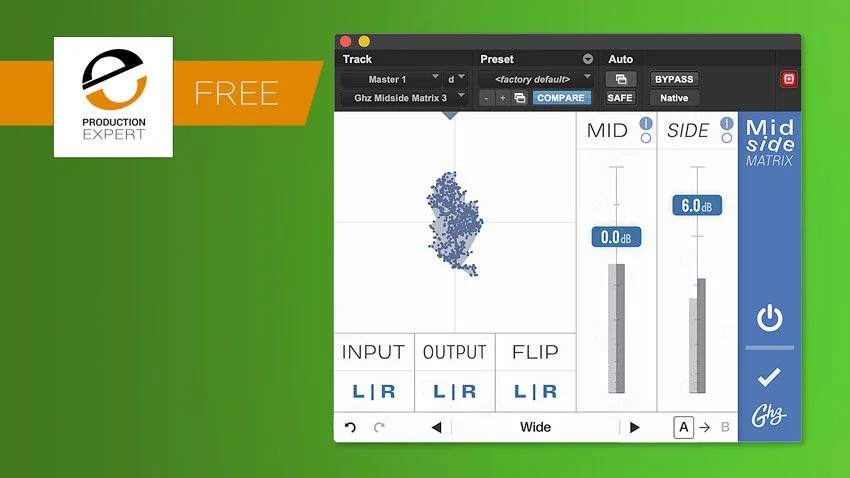
If you want to experiment with mid side the easiest way to get started is to use a dedicated plugin to do the necessary processing, one of my favourites is from Goodherz. Midside Matrix is free and easy to use and if you haven’t experimented with mid side before it’s a great way to get started.
There are a wealth of stereo wideners out there, including many free ones. A favourite of ours is Polyverse Wider. Watch the video below to check out how effective and simple it is.
How Far Is Too Far?
Wide is attractive and impressive, it’s not hard to manipulate width, and as long as you don’t go too far it’s a great idea. But how far is that? This is where a mono check becomes essential. If you have a monitor controller or interface which has a mono button then use it. If you don’t you may well have a mono button in your DAW, for example in Studio One you just click the stereo/mono button on the output on the mixer to sum your stereo to mono.
In Pro Tools there isn’t a mono button on tracks in the mixer but there is a workaround which involves using one of the stock AIR plugins. If you instantiate a Stereo Width plugin on the Master Fader and set the width control to 0% then you’ll hear your stereo audio summed to mono. To hear regular stereo just bypass the Stereo Width plugin. This is an effective trick, as long as you remember that the Stereo Width plugin should be in bypass unless you are doing a mono check! Because it uses a plugin you can do mono checks of submixes while hearing the rest of the mix is stereo too. Try it.
Want Dramatic Mono Compatible Stereo For Free?
A really nice trick which is completely mono-compatible is illustrated by contributor Ufuk Onen. Hear it in the video below.
It’s a clever combination of short delays and polarity inversion and it works so well in mono because it’s in addition to the dry signal and although it cancels out completely in mono, it leaves the original audio intact. Try this as it’s really clever, and of course as you build it yourself you’ll understand exactly how it works!

Photo by Anna Pou