
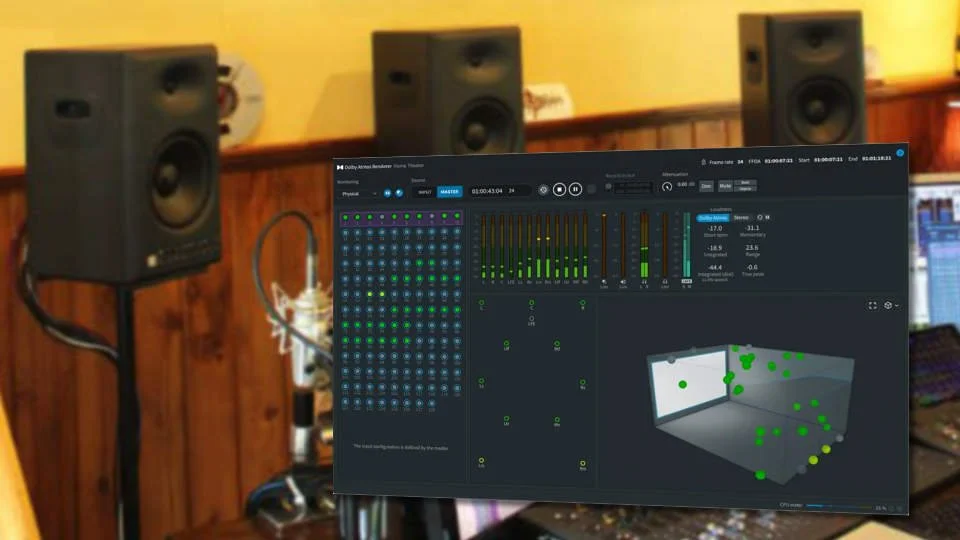
When calibrating my 7.1.4 system for the first time, I came up with a quick, low-tech solution for calculating the delay times for each loudspeaker. I used single-sample impulses separated by 5,000 or 10,000 samples, recorded the playback with a microphone at mix position and adjusted the delays for each speaker accordingly. Included here are Dolby Atmos Master Files (DAMFs), an ADM file, and Pro Tools sessions. This is not a high-end solution that you might achieve with a hired acoustician. But it’s accurate and fast and much better than doing nothing when it comes to speaker delay. Good mixes sound noticeably better on my system post-calibration, and bad mixes are more exposed for what they are on my system post-calibration.
How Do The Professionals Calibrate Systems?
Taking the example of field engineers at Dolby Laboratories. They rely on a combination of tools to achieve consistent results and ensure accurate translation across the ecosystem. Their standard procedure is to calculate delays in Smaart Live as the program’s Transfer Function and Impulse Response capabilities provide resolution to the hundredth of a millisecond. If impulse responses are difficult to obtain, they can utilize phase alignment. If the above methods prove inaccurate due to physical or acoustic challenges, the engineer can use a tape or laser measurement device to calculate by hand.
Returning to my lower-tech solution the DAMFs contain single-sample impulses at -2dbfs on each of the (9) satellite bed channels, all channels at once, and then single-sample impulses at -2dbfs on each of (11) objects parked at loudspeakers in a 7.1.4 configuration, and all channels at once again. And then for curiosity’s sake, the bed and object tests are repeated on top of each other with 5db gain reduction to avoid clipping. The timing signal on the LFE channel is 2 cycles of a 40Hz square wave at -12dbfs. The reason for this is that a single sample impulse doesn’t excite the subwoofer quite enough for easy measurement. And the leading edge of a sine wave is too slow to measure easily. So a (theoretically) infinitely-fast leading edge of a square wave should get the woofer moving quickly.
To do the test, put an omnidirectional microphone at the listening position and play back the DAMF while recording. Use the buttons below to download the files necessary for the test. There are two DAMFs, two Pro Tools sessions, and one ADM file:
Note that I started with the 96k version, and then did save session copy in Pro Tools, sample-rate converting the original 96k impulses and square waves, and then re-recorded the output to make the 48k version. Here’s exactly what’s in both the DAMFs and the Pro Tools sessions:
At 96kHz separated by exactly 10,000 samples each, or at 48kHz separated by exactly 5,000 samples each:
Single sample impulse on the bed starting at 0 samples (01:00:00:00 timecode at 24fps) in this order:
L, R, C, Ls, Rs, Lrs, Rrs, Ltf, Rtf
Lfe 2 cycles 40Hz square wave on the bed
ALL single sample impulse on all satellite bed channels
(then the above repeats)
Single sample impulse objects in this order:
L, R, C, Ls, Rs, Lrs, Rrs, Ltf, Rtf, Ltr, Rtr
Lfe (C) 2 cycles 40Hz square wave object
ALL single sample impulse on all object channels
(then the above repeats)
Finally, the bed and object tests are overlaid on top of each other. Not sure how valuable a test this is, unless of course there’s a chance that your beds and objects are not aligned in the renderer.
You might notice above that the LFE test on the object group is playing out of the center channel. This is because objects don’t have access to the LFE, but objects are bass-managed. So to do this test the most accurately, one would mute the center channel, record another pass, and measure the delay time of the bass-managed object signal, which in theory could be different than the LFE signal, especially in configurations with two subwoofers. I recommend doing it this way, despite the complexity.
The “ALL” single sample impulse is particularly revealing. If you hear any flamming at all at mix position, then you know you have work to do. Also note that even after calibration, when you step away from the mix position, you will hear flamming.
Zoom In On The Delay
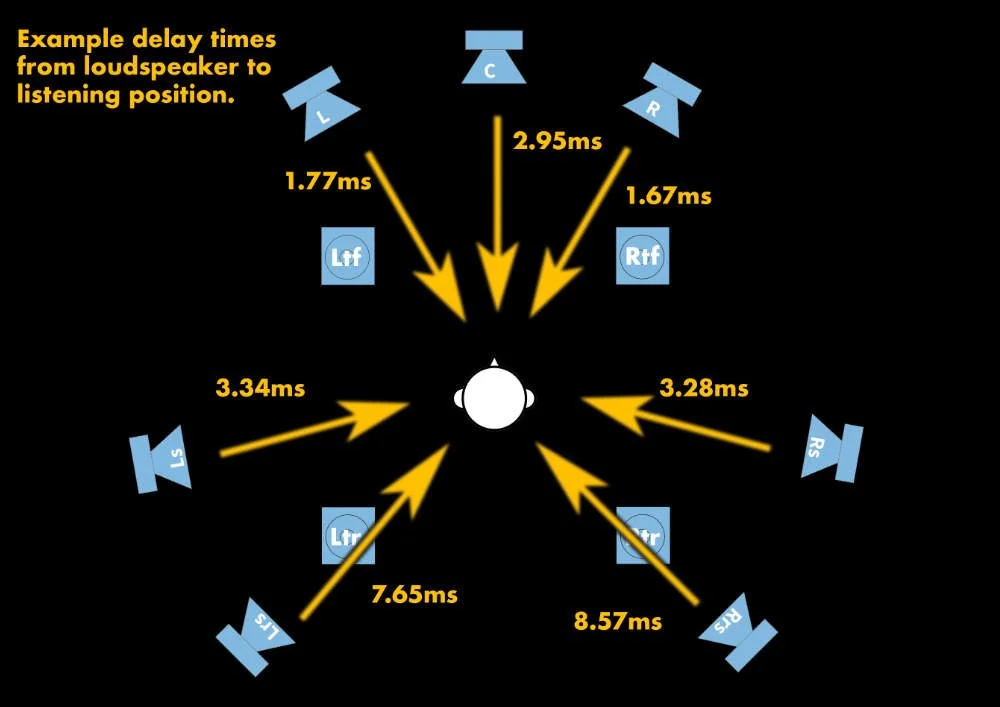
Because this is the low-tech solution, we’re not using timecode or word clock to synchronize the recording made with the microphone. We’re going to use our eyes. Open the Pro Tools session and align the recording on the empty “Microphone” track so that the speaker with the most delay is tightly aligned with its corresponding source impulse (see picture). Then using the selection tool, measure the distance between each source impulse and its corresponding recording. Each impulse should be a bit early at this point. Depending on what hardware and software you have (Dolby Atmos Mastering Suite, MTRX, MTRX Studio, Focusrite, Metric Halo, etc.) delay times for your loudspeakers might be defined in milliseconds instead of samples. This is actually better, since milliseconds are independent of sampling rate and can therefore accurately switch between sampling rates. And (with apologies to the more mathematically-advanced), here’s the equation for the rest of us to convert sample values to milliseconds:
Milliseconds = (samples divided by sampling rate)*1000
500 milliseconds = (24,000/48,000)*1000
After you’ve entered the best possible delay value for each speaker, record the DAMFs again, and compare the result. It should be visually and aurally much tighter. Adjust and repeat as needed.

Questions
Why didn’t I build the Pro Tools session and DAMFs based on milliseconds in the first place? Simply put, they’re not accurate enough. When you zoom in on the waveform of a recorded impulse, the finest gradation would be 48 or 96 samples in an integer millisecond grid. That’s too coarse a step. Since we’re trying to make this as tight as possible, it’s worth getting sub-millisecond values from the test.
0.01 milliseconds (one-hundredth of a millisecond) at 96k is roughly equal to 1 sample.
0.02 milliseconds (two-hundredths of a millisecond) at 48k is roughly equal to 1 sample.
Why not use physical distance from mix position to each loudspeaker and calculate the delay with the speed of sound? This technique is useful in live sound situations, but in a studio the measurements are smaller and more difficult to do accurately and they don’t take into account computer buffers and D/A converter delay, etc.
Why is loudspeaker delay in immersive mixing so important? One of the biggest traps an immersive mix engineer can fall into is too much signal correlation between speakers or objects in the room. A monitoring system without proper delay correction can mask this problem. Uncorrected rooms actually create decorrelation, which will give you the impression of a mix being better than it actually is.
I welcome any critique or suggestions for improvements in the comments below. And as I mentioned at the top, this simple process only scratches the surface of what can be done in acoustic calibration. Sound pressure level, frequency response, phase alignment, room decay times, etc. are all important factors for critical listening and should be addressed.
