At last! You scored your first gigs as a film composer, your musical inspiration is at its top, your DAW is up and running and you have the best sample libraries money can buy… yet your music sounds like it’s being played by a robot.
We’ve always been there: our music lacks the “human touch”. And here is when MIDI control changes, or MIDI CCs, become our best friends.
What are MIDI CCs?
Despite its revered age, the original MIDI protocol is still performing great. Dave Smith did a great job in developing a solid future-proof system that included a host of parameters which, while probably a little redundant to control 40 years old synths, are an essential tool for modern-times composers and musicians who need human-like expressiveness in the music they are producing in their preferred DAWs.
MIDI CCs are the parameters that sample libraries use to shape the behaviour of the instruments they are emulating, in order to reach the best result in terms of life and expressiveness.
CC values usually range from 0 to 127; however, some parameters behave like a switch, where 0-63 = Off and 64-127 = On.
To get the job done, we just need to use a few standard CCs, namely CC 1 (Modulation), CC 11 (Expression) and CC 64 (Sustain).
CC1 is assigned to the Modulation parameter, which in a MIDI keyboard controller corresponds to the modulation wheel. It is used to crossfade between the various dynamic layers of a sampled instrument. This is the most important parameter we need to program, as it defines the character of the notes being played. And no, it’s not a volume control: real musical instruments respond in different ways to different stimuli, so if I gently blow into a trumpet, I will get a softer (obviously!), more mellow tone than when I blast the hell out of it. The sound of a cello being played softly will be more heart moving than a cello being struck by a bow moving like a handsaw.
In the example below, I used the Stradivari Cello from the Cremona Quartet library by Native Instruments.
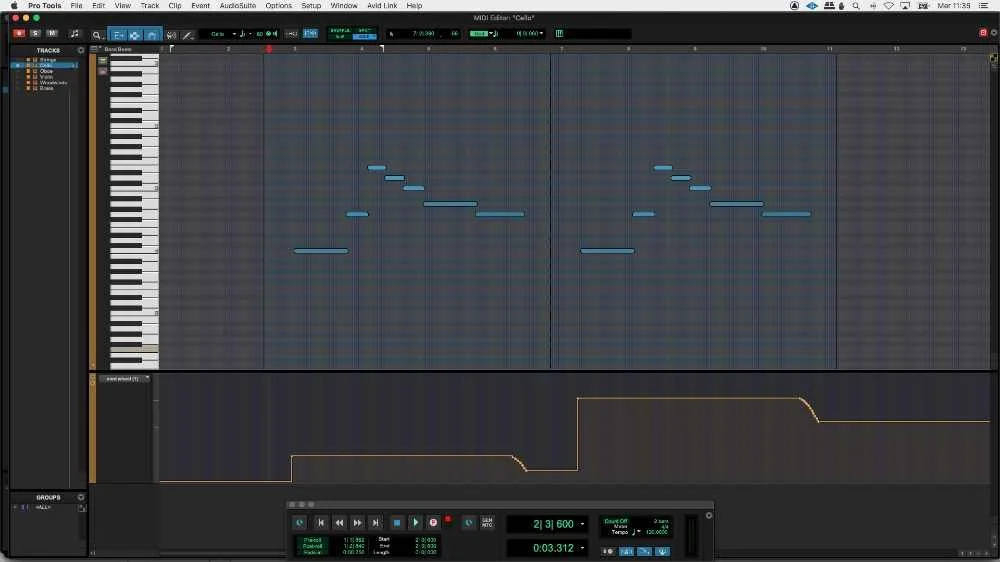
Modulation lane: Two phrases played at low and high modulation respectively
CC 11 is assigned to the Expression parameter. Modern sample libraries use this parameter to control the volume of the samples being played. We can use CC 11 to shape the agogic, or the “envelope”, of a musical phrase and to simulate the physical behaviour of both the instrument and the musician (an oboist or a singer who needs to breathe between phrases, a bow being moved by a violinist).
The next example uses the oboe patch from Spitfire Audio BBC Symphonic Orchestra Core.

First lane: Modulation – The curve represents the global dynamics of the instrument; the three “notch peaks” in the long notes simulate the small gap between repeated notes, which would not yield a natural attack in the second note if played on a MIDI keyboard
Second lane: Expression – The curve emulates the air pressure created by the oboist according to the musical phrase being played
CC 64 is usually assigned to the piano sustain pedal, but it can be used to trigger specific articulations or behaviours, like the use of a mute in brass instruments, without the use of a hand (that is probably controlling other parameters).
For the next example, I used the free Solo Trumpet by Norrland Samples.

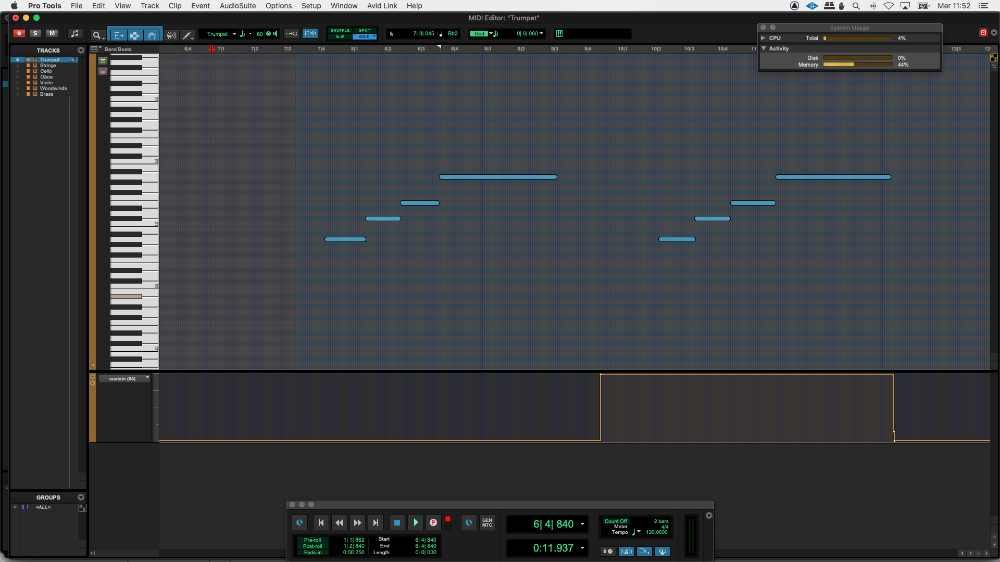
CC 64 lane: the sustain pedal is used to activate the Metal Straight mute, as shown in the instrument picture
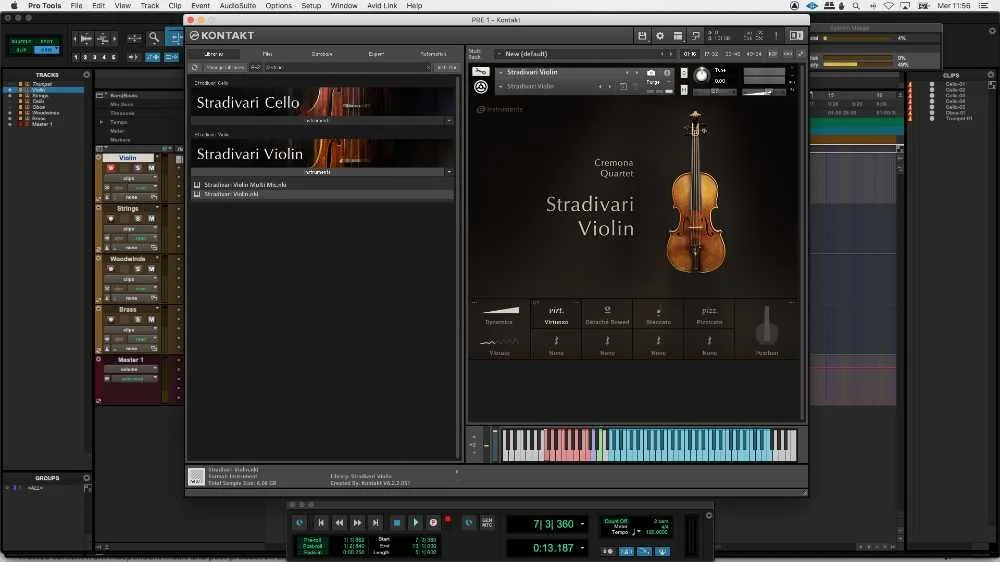
Some complex sample libraries allow the user to assign other CCs to a host of parameters that can improve the expressiveness of the instrument. For example, the Cremona Quartet library includes a Vibrato control, assigned to CC 14 or to a CC number specified by the user.
First lane: CC 14 – The control change controls the amount of vibrato
Second lane: Modulation – the curve represents the dynamics of the instrument
Third lane: Expression – the curve simulates the pressure of the bow on the strings
Programming MIDI CCs
You can either use a MIDI controller with faders/wheels or draw CC curves by hand using the pencil tool of your preferred DAW. I usually tend to use the wheels of my master keyboard while recording and edit the curves with the pencil tool to obtain the result I’m looking for.
But first, you need to understand the way instruments are played by real musicians. For example, a string instrument has different attack times for long notes and runs, which translate into a different volume and character. Besides, the pressure of the bow on the strings varies in time, so small changes in the behaviour of the instrument happen all the time. We can use a combination of CC 1 and CC 11 to create this “movement”, by drawing these subtle changes as shown in the picture below.
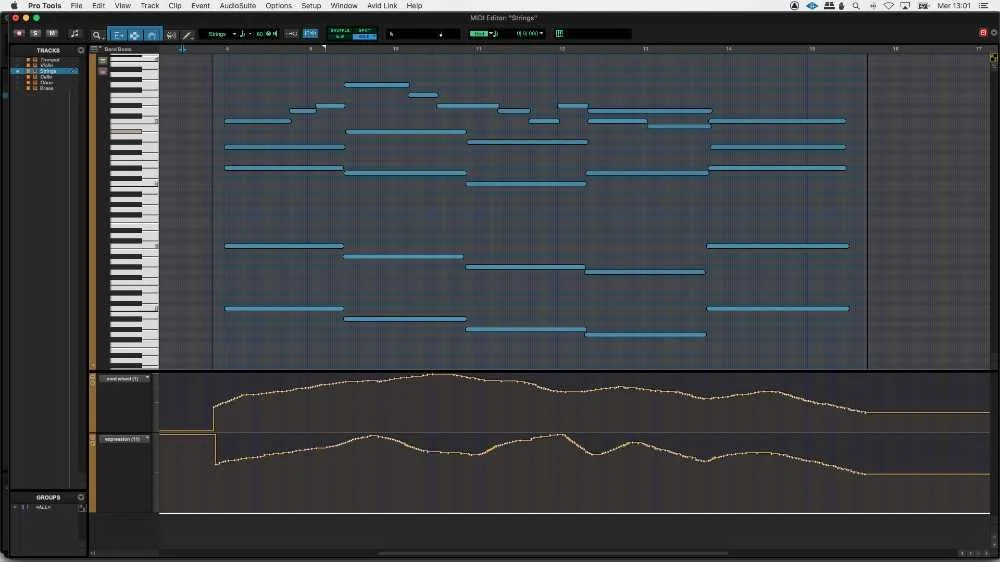
First lane: Modulation – the parameter is used to simulate the dynamics of the instruments, with softer bow pressure levels during the initial and final phases of the musical phrase
Second lane: Expression – the parameter simulates the global bowing of the musicians
The same applies to woodwinds, brass instruments and choirs, also considering that the musicians need to breathe. In this case, we can draw curves that simulate the emission of a specific instrument, taking particular care of the end of a phrase, where the musicians breathe. We don’t necessarily need to add a lot of small variations in long notes, as it is easier to maintain a constant air pressure than bow pressure (for bowed instruments).
CCs can also help us simulate specific needs, such as a diminuendo-crescendo in long notes for a brass section.

First lane: Modulation; second lane: Expression – the two parameters show similar curves to recreate the typical “stab-decrescendo-crescendo” effect. They start at slightly different moments to avoid an excessive decrease in volume when the decrescendo phase starts.
You should also try to avoid programming non-natural curves: a note played in the loudest dynamic range (CC 1 = 90-127) cannot be played at low volumes (CC 11 = 1-40) and vice versa.
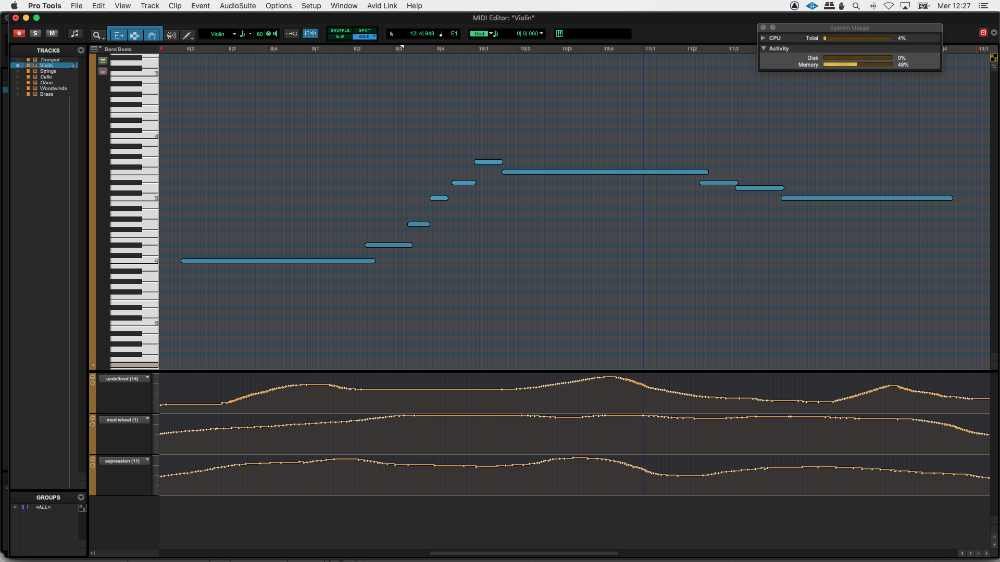
The final audio example is the theme of the “Aranjuez Concert” by Joaquin Rodrigo, in this case played by a solo trumpet accompanied by a full string section, that I’m programming for an orchestral version of “Spain” by Chick Corea, where it’s used as an introduction. I used both CC 1 and CC 11, adding CC 14 to increase the vibrato of the trumpet in long notes with a crescendo.
Experiment, Try And Make Mistakes
As always happens in the life of musicians and sound engineers, the best way to master a technique is a combination of knowledge and experience. So here is a final checklist that might help you master CC programming.
Listen to a lot of music played by real musicians, focusing on a single instrument at a time
Try to visualize a curve that replicates the global pace of the phrases being played
Record a passage on your DAW using the same instrument you’ve been listening to
Draw with the pencil tool CC 1 and CC 11 curves that reproduce what you visualized in step 2
Listen to the result and make small changes, especially in the CC 11 lane, to add “movement”
Repeat step 5 until you are satisfied of the result
Share your opinions and tips in the comments.