
In this article studio stalwart Karen Down offers her thoughts on things to consider when building a recording studio. From planning, through acoustics to cabling, as Benjamin Franklin said “failing to prepare is preparing to fail”.
Building a creative space to record and mix in is both an exciting and daunting prospect. Deciding where to start, your budget and what is and is not important can be tricky. To provide a starting point discussed below are four key areas to consider when creating your space, no matter what size, whether you are converting/building a structure or simply modifying a room.
In 2007 Peter Gabriel launched his ‘studio in a shed’ and illustrated for us the potential of a professional studio at home. Since then, and more so post-pandemic, artists and musicians no longer want to work in a home studio in the original sense of the word. Their preference is to work in a studio at home, a professional, dedicated, creative space.
Building or creating that space takes planning, and most importantly keeping to a budget. With the affordability of more professional equipment, allowing for a greater range of services to be offered, the first thing to consider is what will your studio be used for. What size space do you have available, is it for personal use only, will you hire it out, will you need a tracking room, Atmos, will you install a console or a controller or will you simply re-install your current equipment?
So, before a single cable is laid, you need to plan your studio build/refurbishment project. These are a handful of must dos or considerations to think about.
Planning Permission
Here in the UK one of the first things to ascertain is whether you will need planning permission for your studio. Your local council can advise as to what permissions are needed though a recording studio normally falls within use class E(g)(iii) (formally B1c)* which means that permission is granted under the original planning permission decree. This means that building a recording studio within any property that is residential does not require a change of use application or planning permission. Building a recording studio within a commercial space that has permission for offices also should not require a change of use or specific planning permission.
If your space does not meet the above specification you may need to apply for change of use, and a noise impact study may be needed to satisfy the requirements of the change of use application.
If you are located outside of the UK, you will need to consult your local planning offices on the regulations a studio at home will need to adhere to.
Outside of planning permission you still need to consider your neighbours and, specifically, to consider the transference of sound. You will be making a noise, best to get the neighbours on board rather than fall out later. Next you need to think about sound proofing your space.
Acoustics
The first thing to be aware of is the difference between soundproofing and acoustic treatment. You need to consider both, and, if your budget allows it, you may decide to discuss your studio with an acoustician.
Acoustic treatment will be needed in the studio space to help both absorb (for example with Auralex foam) or reflect (diffuse) the sound in a way that allows the room to accurately represent the sound playing from your speakers. You will want to create an acoustic space that allows you to monitor your mixes without frequencies being prominent or missing.
Every room has its own ‘sound’. The more parallel and solid surfaces the more the sound reflects around the room. When a sound wave encounters a surface, it will either reflect or be absorbed depending on the characteristics of the surface. Usually, a combination of both.
Acoustic tiles (on walls) that effectively control mid to high frequencies and bass traps (fitted in corners and back walls) will be needed to perfect your listening environment.
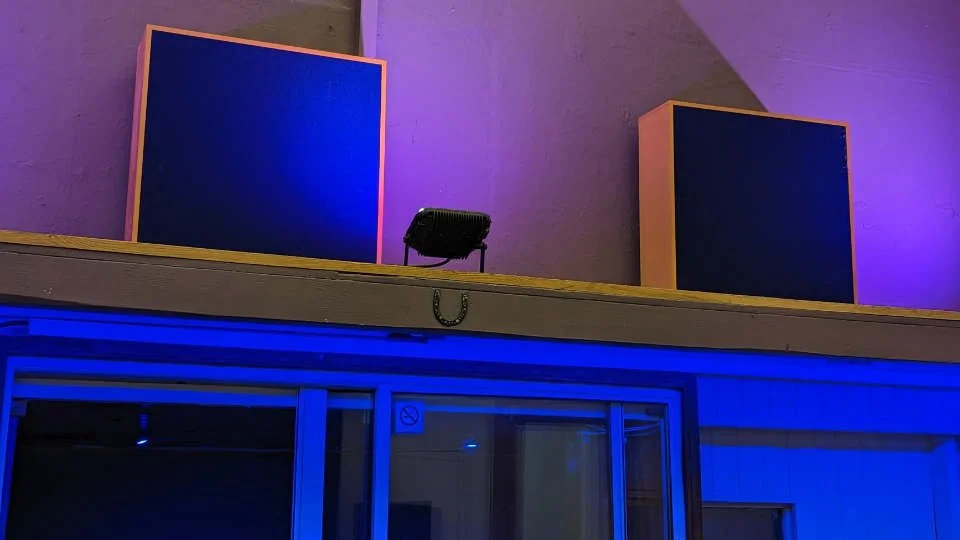
Acoustic treatment on the rear wall
You can use a clap test to listen to your room which will provide an initial indicator as the amount of treatment needed. If the room sounds hard then more acoustic treatment will be necessary, if natural (generally more in larger rooms) then less is needed.
There are also applications such as Audio Tools which will analyse the audio played in the room.
Start by fitting bass traps in the corners of your room to give you control over the low end, and then add acoustic tiles as required, redo the clap test/use the app at intervals and listen to the room as you add more absorption or reflection.
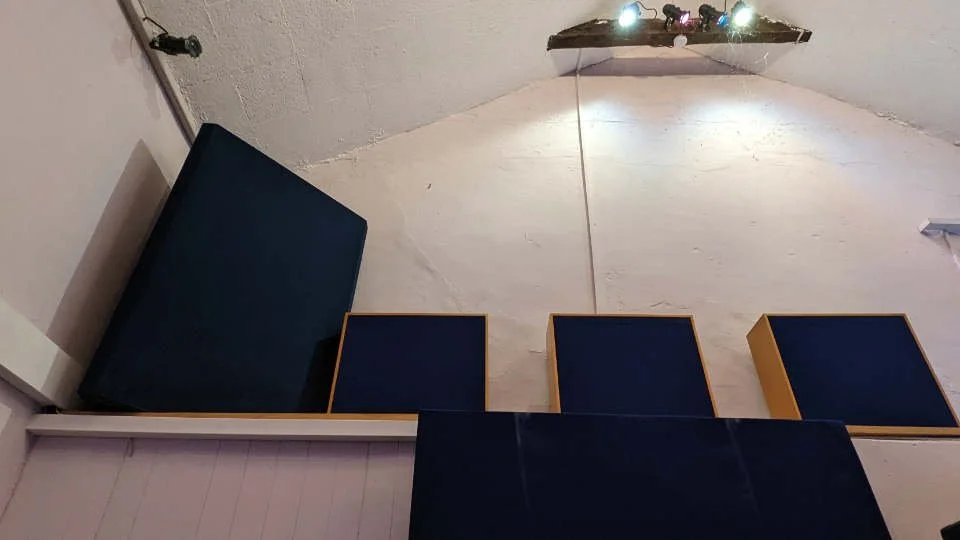
Corner bass trapping
Creating nonparallel surfaces using soft furnishings and a thick carpet or rug will also help control your acoustic space by absorbing or, if you have a wooden floor, reflecting the sound as required. Ideally you aim to create a room with a flat a frequency response as possible.

Absorption behind the vocalist
Once the acoustic treatment is positioned your listening environment may benefit from using one of the many speaker calibration software tools on the market. As every room will sound different these tools will help configure your speakers in a way that will provide the most accurate representation of your mix within your space With the listening position only generally calibrated this which adds weight to the argument to have, by default, your acoustic treatment providing a flat a frequency response as possible in the room prior to introducing calibration.
Soundproofing
Acoustic isolation (soundproofing) is the next consideration for your space. Acoustic treatment is not the same as soundproofing. The internal space is treated with acoustic treatment whereas soundproofing is needed to limit the amount of signal passing into or out of the room.
Sound propagates through the air and through solid construction such as walls and floors. Materials to achieve this type of damping include cork, MDF, OBS (Oriented Strand Board), Plasterboard and Fibreglass. Sheets of mass loaded vinyl (MLV) will also block noise from passing between rooms. It also has the advantage of absorbing sound.
You may wish to consider a floating floor or a floating room to help improve the sound isolation of the space. These will absorb sound and reduce noise transfer between rooms. They can also increase structural stability by distributing the weight evenly. Floating floors can be an affordable method of isolating your room and keeping the neighbours happy.
Adding double or triple glazing to the windows will aid the soundproofing and do not forget to modify the door to the studio so that it too blocks sound leakage.
For those who are not able to build in their space, improvements to your room will need to be made with acoustic tiles, bass traps and soft furnishings as discussed. With sound proofing airtight sealant around windows and sealing any other air gaps is a good starting point. Soundproof curtains or blinds will aid in soundproofing your room
Friendly Techs
Having a good tech, or friends who have technical skills, is essential to your studio build and maintaining your studio equipment long term.
Whilst you may have production skills, are a great mixer or can get a decent drum sound, how good are you with hardware? Can you wield a soldering iron, a screwdriver, can you change a power supply in your mixer, replace a dodgy switch or rewire your rack? Can you look after your IT, download and install software and drivers, configure routers or set up external storage?
Whether this person is you or not, someone on the project will need to understand enough about your workflow to help identify issues with the kit and advise on the build. He/She will help you plan the room and rack layouts (remembering to leave ventilation gaps where required). You will need to decide on cable runs and trunking to hide cables. Lighting (no dimmers), positions of speaker stands, room furniture - everything needs to be considered before any work is done.
Having a good tech, or a good understanding of your setup, can help tremendously when troubleshooting faults or when speaking to manufacturers about product issues. The takeaway for your build is to draw up your room plan with your friendly tech.
Cables
As mentioned, planning the location of equipment should be done at the beginning of the project. From this plan cabling requirements can be calculated (and do not forget about scaling up - consider where you may need to plumb in future purchases).
Cables can be expensive and so when calculating your cable budget build in a buffer to cover future requirements. It is wise to allocate an additional 20-25% of your entire budget. It is also advisable to build in cable redundancy to your equipment racks or surfaces. Adding an extra network or interface cable or two may save headaches later. It is wise to consider technologies you may be using in the future and what their connectivity requirements are.
Consider, do you or your tech have the skill and the tools to do the work. If you have decided to make your own cables measure twice and cut once. For some cable types purchase will be the simpler option.
You will need to consider different types of cabling, connector types and (for extra credit) draw up a cable schedule which will allow you to number both ends of the cable and so make troubleshooting a lot easier. Remember that as well as the cable number you should note down cable location and function. If possible, cables should be neatly secured in place and laid through trunking either under the floor or around the edges of the room. A neatly laid, labelled cable is easier to fault find and less likely to ‘get borrowed’ in a session.
You should also plan to keep your power and audio cable wiring separate to avoid any interference and remember that the shorter your audio cable runs are the less likely you are to pick up any interference or experience degradation on your signal. There are many different types of studio cabling, some you may need to consider installing are:
1/4” TRS
XLR (phono)
RCA
Interface Cables – USB, FIREWIRE, THUNDERBOLT
MIDI Cables
Optical Cables – MADI, ADAT, SPDIF
BNC Cables
Network Cables (Cat5e, Cat6)
HDMI
Building a creative space will take energy, humour, funds and time, with many things to decide upon and manage. The takeaway here is to resist shortcuts and get the job done right the first time. The result will be a studio at home you will be inspired to create in.
*is for use for any light industrial process, being a use which can be carried out in any residential area without detriment to the amenity of that area by reason of noise, vibration, smell, fumes, smoke, soot, ash, dust or grit.

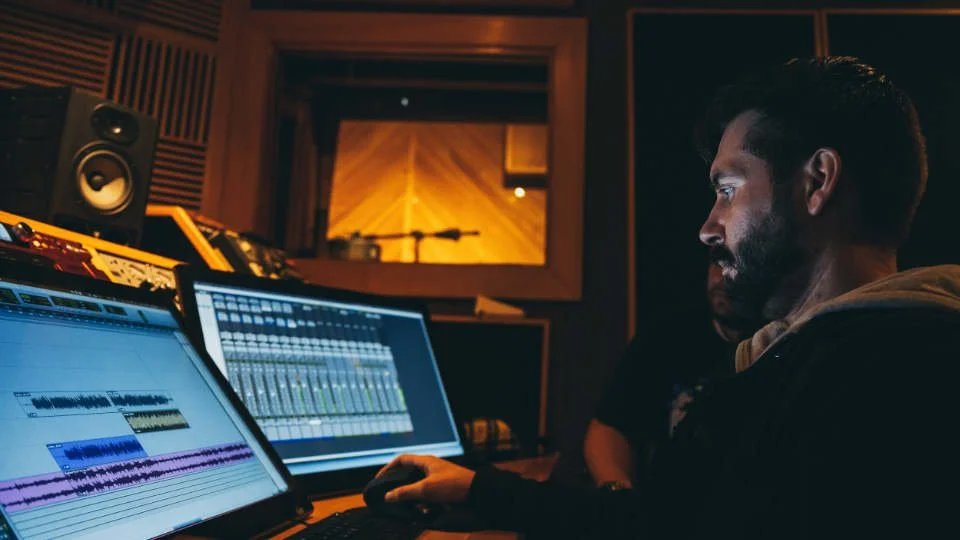
Photo by Brett Sayles