

Speed up your workflow and get more done in the studio with these time-saving tips.
1. RTFM!
Our first suggestion almost goes without saying, but nonetheless, we’ll wager the majority of producers have never actually sat down and read the manual for their DAW cover to cover. Of course, it’s perfectly possible to get by and function quite effectively without understanding your recording and mixing platform of choice inside out, but who knows what power features and workflow optimisations you could be missing out on by skimping on that preliminary learning stage? The PDF or online manuals for most DAWs are very well written, utterly comprehensive and searchable, the last adding to their utility as a quick reference source once you’ve digested the whole thing.
The same applies to any other software you use, too, including plugins. The current generation of high-end synths, samplers and effects are full of technological surprises that you might never stumble upon by accident, so do take the time to bone up on their documentation.

2. Learn And Customise Your DAW’s Key Commands
Nothing accelerates your workflow more than mastering your DAW’s key commands. The amount of time spent moving your hand between the mouse and keyboard, then dragging the mouse around just to select the pencil tool or apply a clip fade, say, is far more than you probably think, but by taking advantage of your DAW’s key commands, you can reduce this to almost zero, controlling everything from transport controls and window layouts to MIDI sequencing and audio editing functions, directly from the QWERTY ’board.
DAWs vary in the range of key commands they offer and their customisability, but all of them provide more than enough to enable a degree of manual dominance that leaves the mouse sitting in dust. Logic Pro is, perhaps the king of this particular hill, with a staggering diversity of commands onboard, many of them accessing functions that can’t be got to via the menus, and all of them fully customisable. Whichever DAW you’re using, though, getting to know its key commands is the single best shortcut to a smoother music-making ride that you can take.
3. Don’t Turn Your Nose Up At Sampled Loops
While we fully appreciate that, as a credible and committed artiste, you might never want to get within ten feet of a sampled loop, we would urge you to reconsider that stance in the interest of getting things done – and even embrace the deployment of commercial loops as a creative opportunity. These days, there are so many truly excellent sample libraries coming from Loopmasters, Zero-G, Sample Magic, ModeAudio, Big Fish Audio and countless other houses, that the sheer convenience and sonic scope they bring simply can’t be ignored.
Sure, it’s unarguably more rewarding and artistically ‘valid’ to put in the effort and record your own instrumentation, but when time and circumstances are against you (if you have to hire in a drummer or guitarist, for example), save yourself the hassle and perhaps cost and grab a line from a library instead. There’s no end to the modifications you can then make to it if individuality is a concern (which, naturally, it will be), and once you’ve got it in the mix and sounding the part, any worries about ‘cheating’ will soon melt away.
Many synth and keyboard-based sample libraries also come with the MIDI files used to play their audio loops, so if you like the notes but not the sounds, you can point these at your own synth or sampler patches; and being MIDI, these are even more manipulable than their audio equivalents. Bear in mind, too, that sampled loops are also the ideal solution when you just want to throw a sound or two from outside your stylistic comfort zone into a track – a breakbeat or synth riff in a rock number, for example.
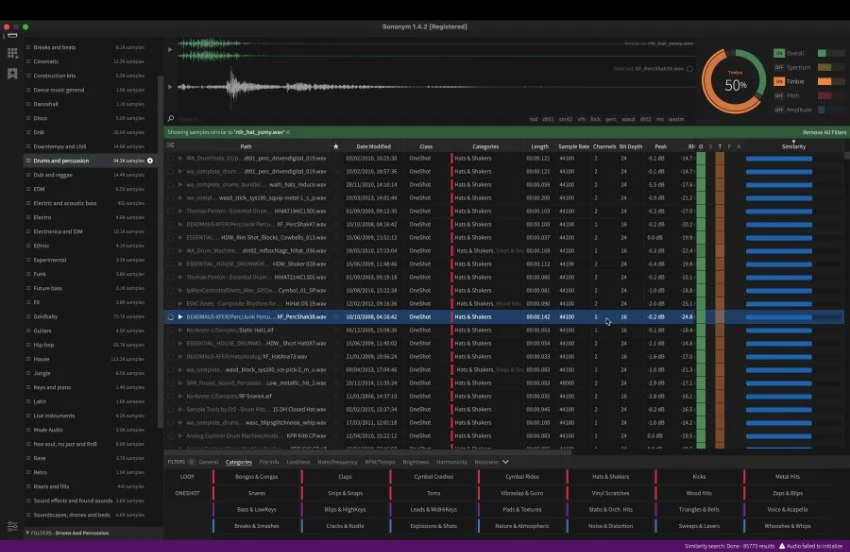
4. Make Your Go-To Samples Readily Accessible
Even if loops aren’t your thing, you no doubt have a sizeable library of one-shot drums, instrumental multis, FX and ear candy samples on your hard drive, and if you’ve never put aside a day to get these bread-and-butter sounds organised for rapid and effortless access, we highly recommend doing so. Whether you simply build a meaningful folder structure around them, employ a librarian application such as Sononym or Waves Cosmos to pull them all together, or map those multis and drum hits into sampler patches for MIDI triggering and performance, being able to speedily navigate to or fire up a multisampled bass guitar or bank of spot effects within seconds, rather than spending minutes hunting through a hodgepodge of folders for something you’re not even sure you actually have, can only benefit your overall productivity.
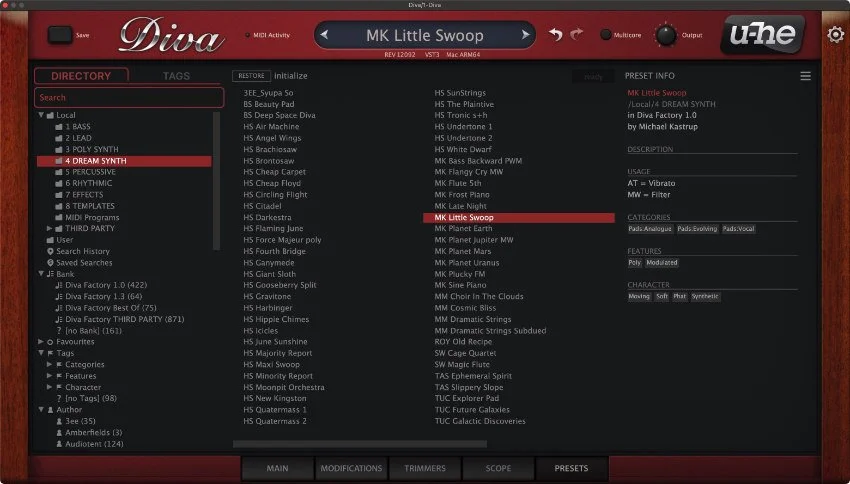
5. Load A Synth Preset Rather Than Start From Scratch
And the same applies to synth patches! It takes a fair bit of knowledge and experience to cook up convincing synth bases, leads, pads and all the rest of it from ‘Init’ patches, which is precisely why plugin developers include vast libraries of presets with their instruments. Again, you shouldn’t ever feel that drawing on these represents any kind of creative cop-out; and you don’t have to use them as is, but rather select one in the same ballpark as the sound you’re hearing in your head, then adapt it as required. Even for the experienced synthesist, this is always going to be much quicker than starting from a totally blank canvas.
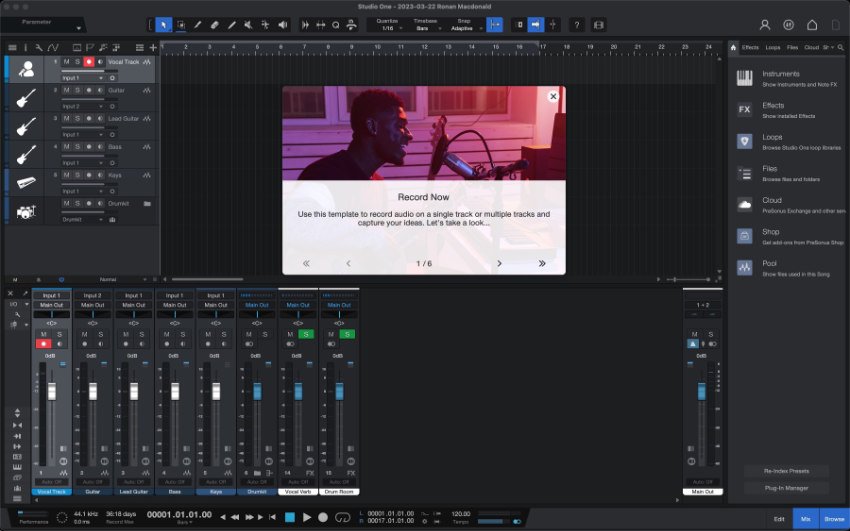
6. Use Project Templates
Every major DAW enables the construction and storage of template projects for use as jumping-off points, removing the creative stumbling block of having to set up tracks, routings and basic channel strips from scratch every time you start a new song. A template could contain just a couple of tracks for recording guitar and vocals, all the necessaries for tracking a full band, an array of plugin instruments and effects for electronic production, or anything else you might find yourself calling on as a foundation with any sort of regularity. And helpfully, a collection of task-specific examples will likely be included with your DAW, making handy templates for your own templates, so to speak.
7. Save Your Own Channel Strips
Taking things to a more microscopic level than the aforementioned project templates, channel strip presets are equally useful when you just need to call up a frequently used vocal chain, guitar sound or other known track configuration. Your DAW will facilitate the storing and organising of channel strips – with volume, pan, EQ, dynamics and effects all in place – in one form or another; and some even facilitate import of channel strips from other projects, making it easy to call on individual channels from your templates.
What organisational techniques have you found helpful to your workflow? Let us know in the comments.

Photo by Techivation on Unsplash