

‘Ear candy’ is quite a loosely defined concept in music production, but the generally accepted definition is any small incidental sound or effect intended to grab the attention momentarily, without detracting from the bigger picture presented by the overall mix. Ear candy comes in an almost limitless variety of forms, from sub-bass dives, explosive impacts and bright percussion hits, to zaps, sweeps, sirens and beyond, and when it’s done well, it really can make the difference between a good choon and a great one. Here are five ideas to get the juices flowing…

FX: The Art Of Ear Candy
The easiest way to work a bit of ear candy into a track is to plunder a few sample libraries for sound effects, throw them into the mix at appropriate points and just see what sticks. There’s no shame in taking this prefab approach, especially if you use plugin effects and editing to make those samples your own; but you’ll undoubtedly get more satisfaction out of rolling your own audio confectionary using synthesisers, found sounds, punctuative instrumental recordings (percussion hits/scrapes/shakes, guitar chops, keyboard stabs, etc) and other original source material.
Almost any synth can be pressed into action for this sort of thing, but those built on wavetables are particularly amenable, thanks to the complexity of their raw tones, as are chiptune orientated instruments such as Plogue’s chipsounds and Impact Soundworks’ Super Audio Cart, which are ideal for introducing evocative fast-arps and other sparkling retro noises.
Rise To The Occasion
Risers are commonplace in dance music, used to elevate builds and enhance transitions; but short risers can make for great ear candy in any musical style.
In general terms, a riser is a sustained sound that ‘rises’ in volume, pitch and/or filter cutoff frequency from start to finish, culminating in an ‘event’ of some sort – the drop in a dance track, the chorus in a pop track, the introduction of a key vocal, etc. To apply it as an ear candy element, simply make it very short – a bar or just a couple of beats – and layer it in as an integral background component behind the rest of the mix, rather than positioning it as an obviously focal part.
For riser source material, rendered synths and white noise are the go-to options, but why not try a timestretched guitar chord, orchestral stack, choir or other manipulated real-world sound? Load your sample onto an audio track or into a sampler, line it up or stretch it so that it starts and ends at the right points on the timeline, then use automation in the DAW to ramp up the volume, pitch, filter, distortion and/or any other parameters that might add to the excitement.
Reversal Of Fortune
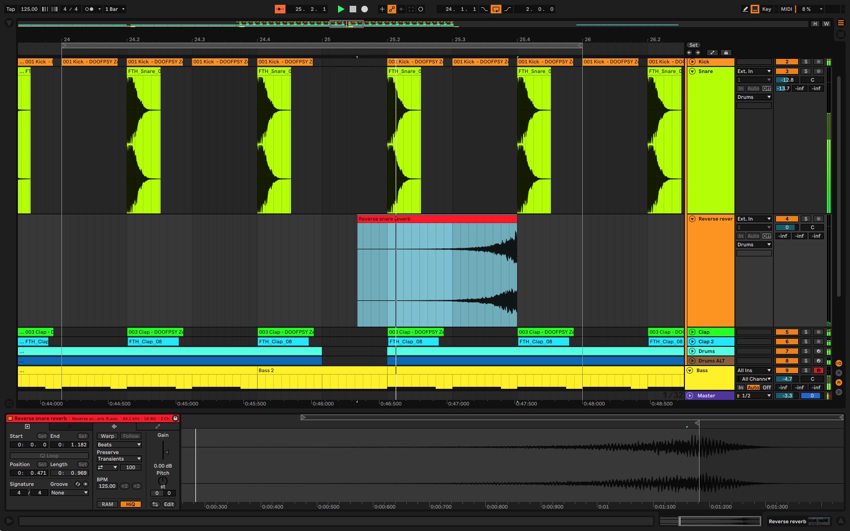
Another sound design classic, the reverse reverb is usually thought of as long, ‘haunting’ and leading into a vocal or piano line, but like the riser, a very short reverse reverb can serve as delicious ear candy when sporadically deployed on snare drums, tactically selected words within a vocal, the odd lead synth note, or anything else along those lines.
To make it, create a copy of your source audio clip (a snare hit, for example), reverse it, apply your reverb plugin of choice to the reversed clip 100% wet, and render the result as a separate clip. Then reverse that clip (the fully wet reverb) and place it in front of the source clip so that it leads into it, creating a characteristic ‘sucking’ effect that never fails to add interest.
The Master Bus Stutter
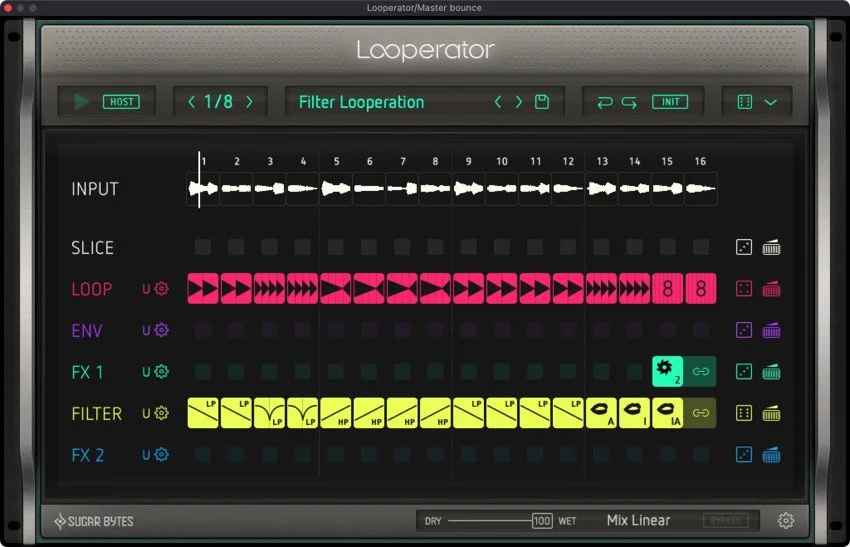
Stutter and glitching effects, as generated by the likes of Sugar Bytes Looperator and Illformed Glitch 2, or composited by hand in a sampler or on-track, can work well as ear candy when applied briefly to individual sounds. If you really want to surprise your audience, though, stuttering or rhythmically gating the entire mix (or all of it bar the vocal or lead instrument) for a beat or two, just once or twice in the track, is a surefire way to do it.
The idea is to create a jagged, chopped-up ‘break’ at a meaningful point in the arrangement – just before or at the end of a chorus, perhaps, or at the very end of the whole track – and all you have to do to make it happen is stick your glitching plugin of choice on the master bus, and automate the bypass to switch it in and out at the right moments. Alternatively, bounce the whole mix down to a single track, slice it up there by hand, and cut it into the main mix as required. Do keep the processing or edit very fleeting, though – this is meant to be ear candy, not a grand stylistic statement.
Spin And Win
With its on-the-fly, anything-goes sensibility, dub music is a veritable sweetshop of ear candy-inspiring production techniques, and chief among them are delay and reverb spins. With these, the send on a channel routed to an auxiliary delay or reverb effect is suddenly and very briefly whacked up to ‘snatch’ just a small fragment of the signal for processing – an isolated snare hit, a tom fill, a guitar chop, a horn stab, a single vocal word or syllable, etc; short, attacking sounds, essentially. And although in dub, delay spins are often moulded into sustained soundscapes by cranking up the feedback and filtering the wet output of the delay over extended passages, for ear candy purposes, you’ll likely want them to make their presence clearly felt, then get quickly out of the way; so don’t go large with the feedback.
If your spun delay or reverb isn’t sugary enough on its own, caramelise the tail by inserting transformative plugins onto the return channel – distortion, modulation effects, glitchers, auto-filters… experiment! Also, of course, there’s nothing stopping you from implementing the same idea (or just automating the bypass button on an insert) with effects other than delay and reverb: chorus on just the first note of a looping bassline, bitcrushing on the occasional snare, or formant shifting of select words in a vocal, say.
What sort of ear candy do you like to sprinkle on your tracks, and how do you go about it? Share your recipes in the comments.
Photo credit: Hitesh Choudhary
