

In this article, we show you how to create glide notes in Studio One. Gliding is a transitioning effect between notes. The technique is popular in electronica, but can also be useful when emulating acoustic instruments, such as violin portamento. It can be applied to any instrument where pitch bend is effective.
One way to create a glide is by automating pitch bend. Often a better method, for virtual instruments that support it, is to switch on any glide/portamento/legato option available. The good news is PreSonus has given suitable stock Studio One virtual-instruments built-in glide functionality.
Try Out Example
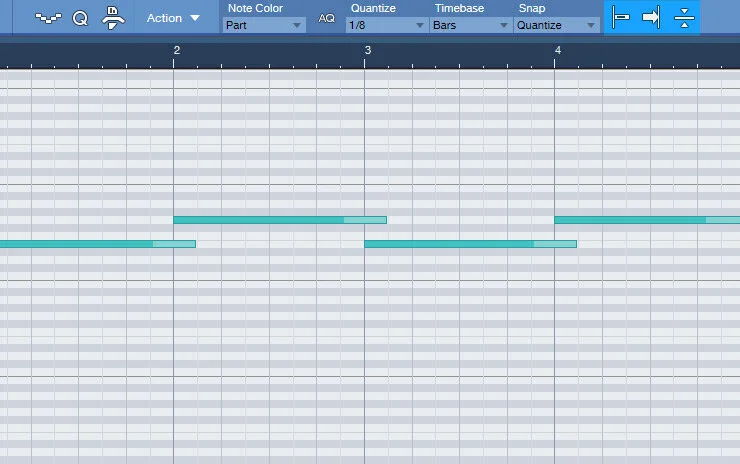
Either way, both methods rely on overlapping notes. We need to begin in the Editor. Be sure Snap is on (toggle N). Add a bar long E3 note followed by G3. Highlight and duplicate them (D). Set the Snap Time to Quantize and the Quantize Value to 1/8. Select the first three notes. Stretch the end of the preceding notes into the start of the next, snapping to the first 1/8th position on the grid. This is where the glide will take effect.
The PreSonus Glide
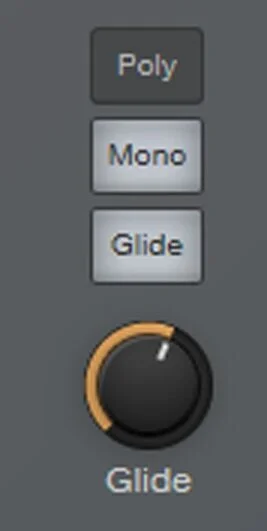
Most Studio One virtual-instruments have a Glide function, although Mojito’s works by selecting on Legato from the Porta menu. We shall be using Mai Tai in this illustration. I chose the Warm Coat preset from the Pad menu. In the far-right column, turn on the Mono and Glide buttons. Turn the Glide Dial to 173ms. Note that the further clockwise Glide Dial is set, the longer the effect lasts.
That’s it! Done! Now on playback, you should hear the notes from one to the next. You can also try playing a legato style by holding notes slightly before pressing the next.
The Pitch Bend Method
For times when we don’t have the luxury of built-in glide architecture, we can achieve a similar effect with pitch bend. It may not be as smooth as the built-in Glide but still a useful effect.
Keep Mai Tai on Mono but switch Glide off. We need to set the amount of pitch bend required in the Bend box. It’s incremental in semitones. Higher the value, the more extreme the effect. I found ‘1’ semitone resembled closet my Glide settings.
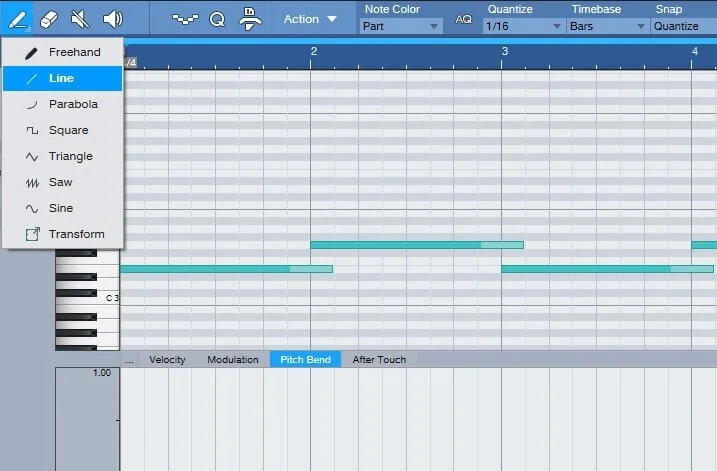
Zoom in to the first overlapping glide notes in the Editor. Now select the Pitch Bend tab below the piano roll. Expand the Pitch Bend view to a comfortable level by dragging the divide upwards.
We need to draw in automated pitch glide. Change the Quantize Value to 1/16. Select the Editor’s Paint Tool and choose the Line option from the menu.
E3 to G3 moves up in pitch, therefore, so does the pitch bend. Click and drag the Paint Tool diagonally, from the 0% pitch bend baseline at the start of the overlapped notes, upwards to the next 1/16th snap position on the grid. Change to the Arrow Tool (1). Click on the highest pitch bend point and make it +55%. Click on the point below and drag it to the next grid position. You should have a triangular-shaped pitch bend.
G3 goes back down to E3 on the second note transition. In this case, we need to invert the pitch bend. This time take the Paint Tool diagonally down from the baseline to the next grid position. Use the Arrow Tool to set the lowest point to -55% and complete the inverted triangular shape at the baseline.
Now listen to the playback. You should find a similar gliding effect where applied. If you want more of the effect, increase the pitch bend percentage, or semitones value in Mai Tai’s dialog box.
Third-party instruments should have a similar option for setting the pitch wheel. For fine adjustments, try flexing the middle tension point. Once you are happy with the glide effect, select the points by dragging and highlighting them. Cmd/Ctrl-C to copy. Now paste (Cmd/Ctrl-P) in the same glide to whichever overlapping notes you desire.
Enjoy your gliding and happy landings!
