
This article shares several ways of adjusting the overall level of a channel in Studio One which already has volume automation written to it. I had to experiment with these techniques when recently working on a mix.
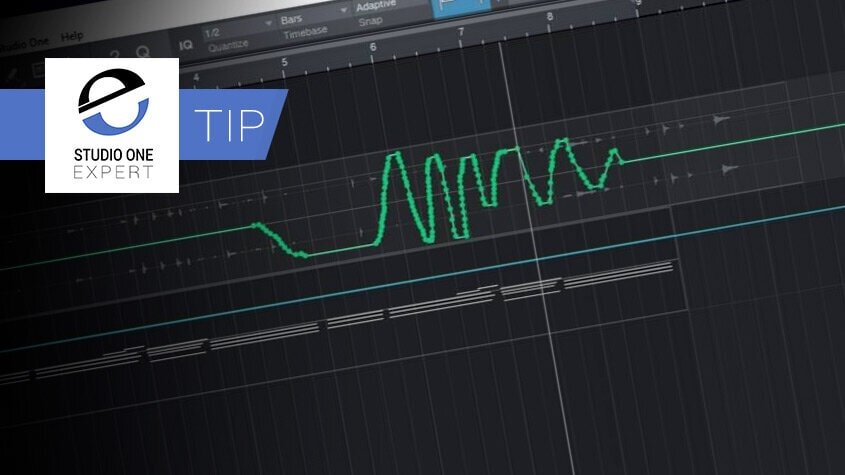
When I was tracking this song I was in a creative flow. I had gritty chorus “Monster” synth line to work with. It was simple but effective – yet needed something more. I thought, how about if I swept the Track’s volume down with the Paint Tool’s Parabola? That did the trick.
When mixing the song a few weeks later I noticed the gritty Monster synth I was previously enthusiastic about sounded too loud in the mix. I naturally went to its fader in the Console but what was this? Monster’s Channel fader appeared to have a mind of its own, falling and rising, no matter what I did. Was there a ghost in the machine? In a manner of speaking, yes!

As you’ve likely guessed being audio engineers yourselves, my eagerness to automate the Volume had resulted in the Channel fader acting out those commands. I wanted to keep the volume automation as it was and had to try several different ways of adjusting the overall level. What did I try? Read on…
Input Gain
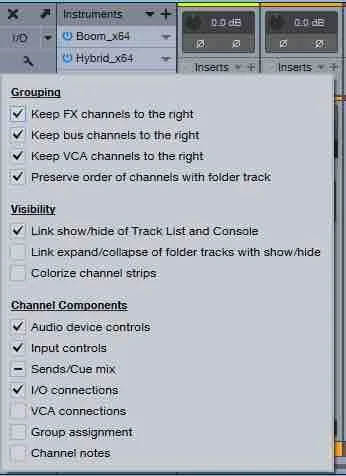
One solution to the problem would be to decrease the Input Gain on the affected Channel. This adjusts the Channel volume before the Inserts. It is a little hidden away unless selected. To show the Input Gain, click on the Options wrench in the left corner of the Console. Under ‘Channel Components’, tick the ‘Input controls’ box. The Input Controls appear at the top of the Console for each Channel.
Event Gain
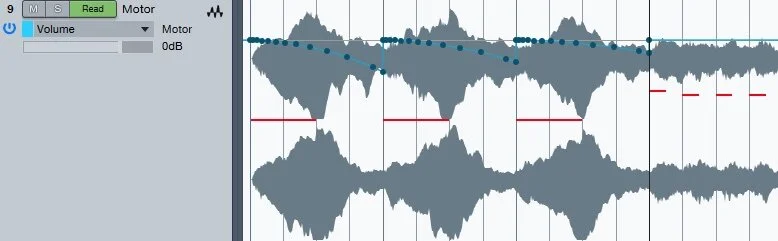
Rather than decrease or increase the volume of the Channel, like with Input Gain, another option is to target specific Events using Event Gain. In my case, this was the better option than either Input Gain or the Volume fader, for I only needed to affect the Volume automation.
To adjust Event Gain, click on the Event. Take the cyan centre square handle down to lower the gain and up to increase it. The triangular-shaped points at the sides allow you to adjust the fades of the Event. Alternatively, one can adjust the numerical parameters in the Track Inspector (F4). You may need to pull up the bottom panel with the grip to view Gain, Fade-In, Fade Out.
Don’t be afraid to cut up Events to get greater precision using Event Gain. This can be done with the Split Tool (3), or by shading the concerned area, and pressing Option/Alt-X. Reducing peaks this way is an alternative or accompaniment to compression.
Plug-In Gain
As helpful as Event Gain was in solving my dilemma, I couldn’t help but think that implementing Volume automation early in the recording made for a poor workflow. At the same time, I wanted to hear the effect that such automation would have on the song.
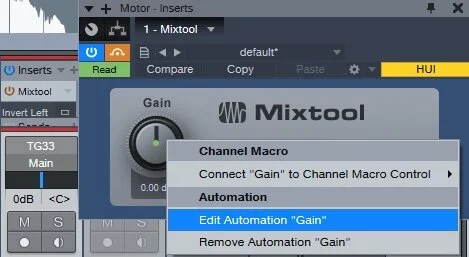
The answer was to automate an effect’s plug-in’s gain instead of Volume automation. The best kind to use is one that allows gain to be reduced to an inaudible level and doesn’t take up too much CPU. PreSonus’s Mixtool seemed like a natural choice.
Right-click on the Gain dial and choose Edit Automation “Gain”. An Automation Lane is added for that parameter. One added advantage to this method is being able to easily Bypass the plug-in if you wish to hear the track without Gain Automation.
In Summary
It is better to keep a Channel’s fader free from volume automation until you are in the final stages of mixing otherwise you will have to adjust the signal flow pre fader which could upset a myriad of other things such as processors triggered by static thresholds.
